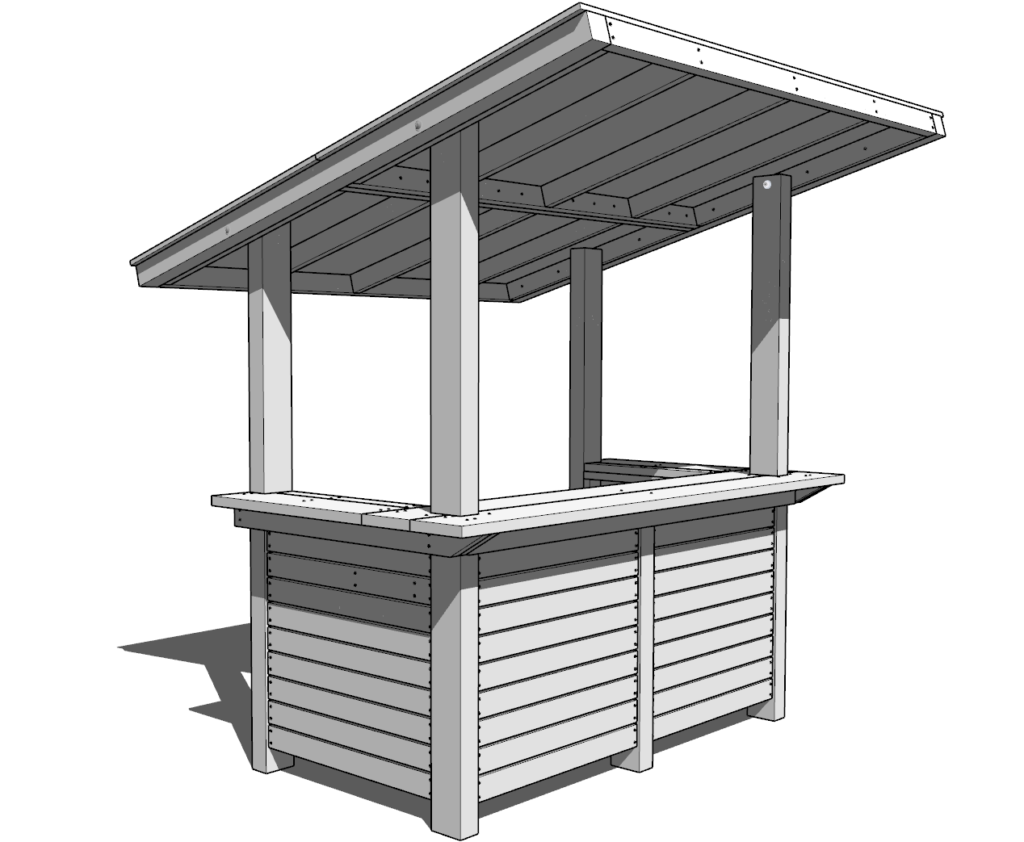
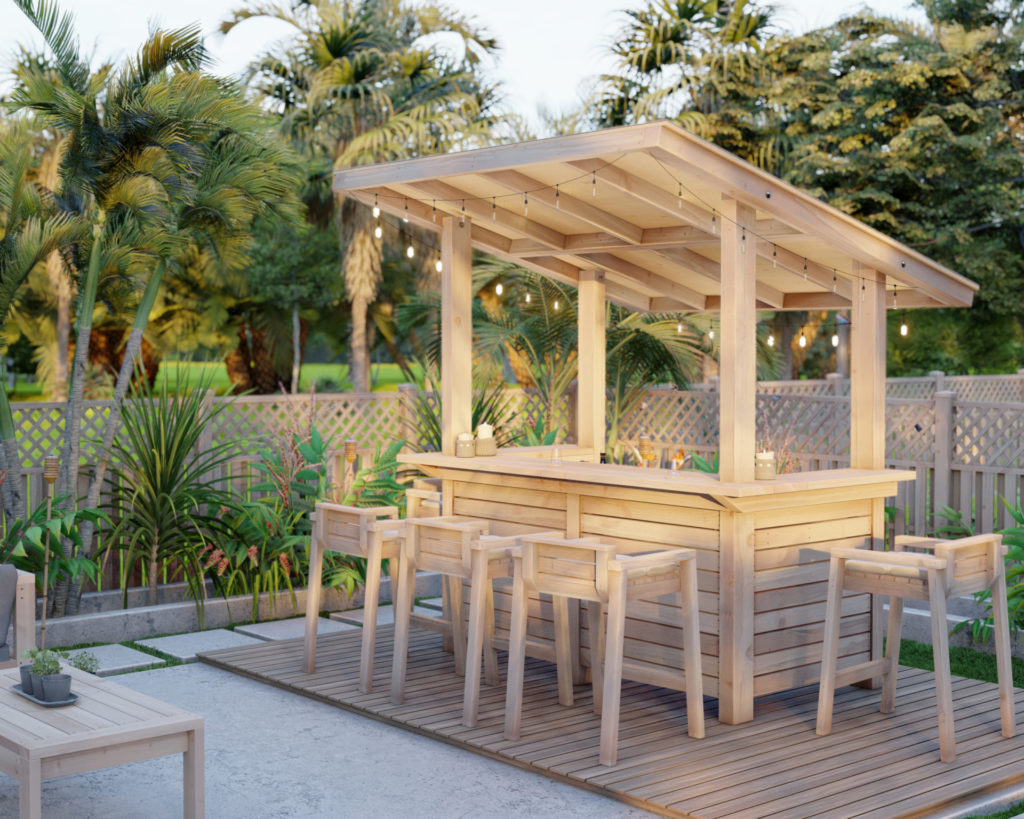
Enjoying time at a DIY bar can be a great way to spend a summer evening or weekend afternoon. This fantastic DIY outdoor bar oasis can be used for a variety of purposes , such equally a identify to entertain guests , a spot to relax and enjoy the outdoors , or a place to only store and serve drinks .
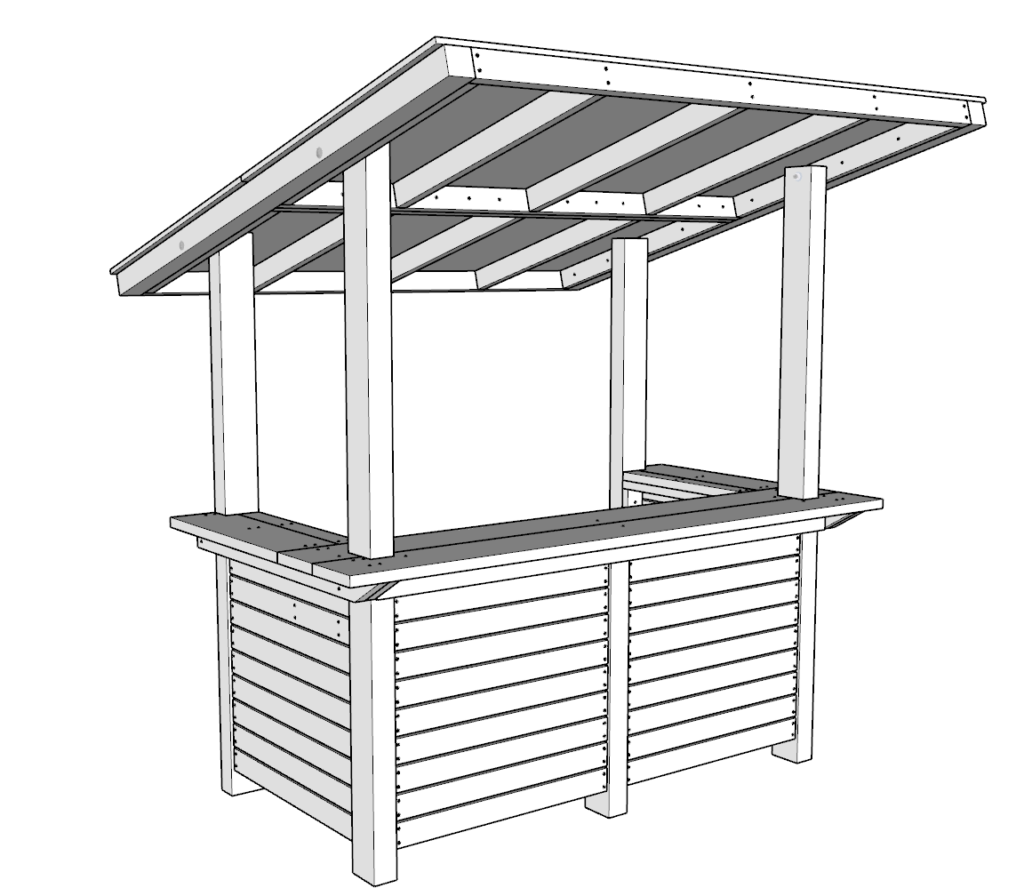
One of the most important features of the outdoor deck bar is spacious seating under an open roof. The bar summit that is tin can comfortably seat 5 people so that your guests can relish their food and drinks without feeling crammed for your next cookout.
The roof helps protect you and your guests from the dominicus and rain. You can utilize the roof to adding personal touches to customize the look and feel of your bar to match your personal mode. One way is to add cord lights around the perimeter of the roof or by add ing hanging plants or flowers . You could also add a sign or imprint to the roof .
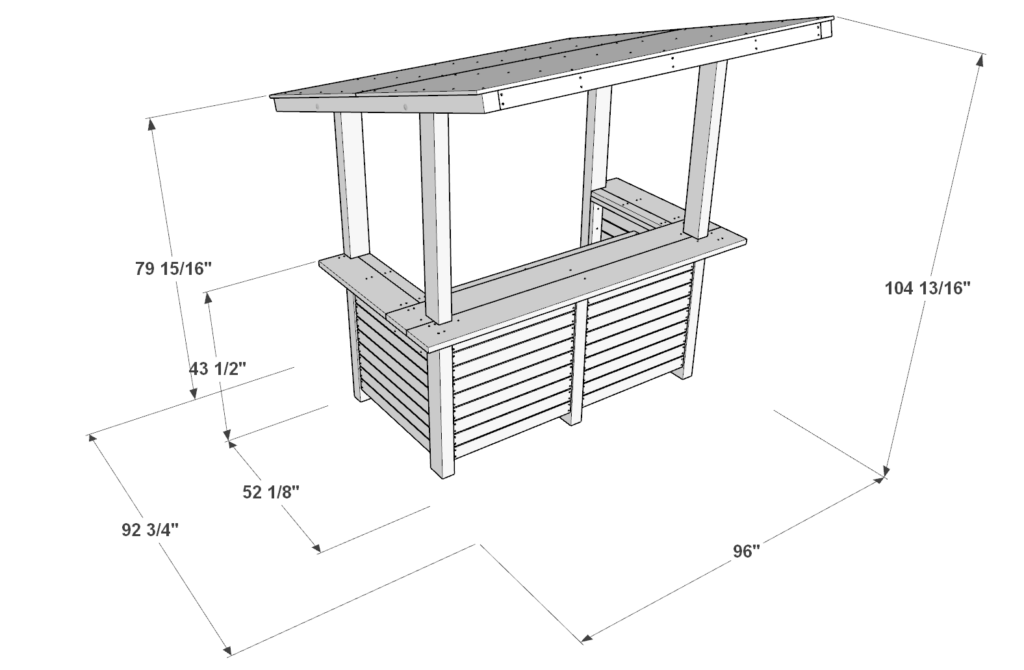
This DIY outdoor bar is more than but seating, it provides a space that enables you to host and service the guests and family in a more organized and professional way. The 2 arms of the DIY bar provide an area where a mini refrigerator, kegerator, water ice maker, or wine cooler tin can exist set up.
You can also use this bar center as a DIY outdoor buffet stand up, taco bar, potable stand, and surface area for dispensing food for guests to take to their seats. Yous can place ice bins and coolers to keep drinks cold for the duration of a backyard, deck, or patio event.
This bar is adept for storage because it not only provides a spacious working infinite but also a shelf underneath that can be used to shop a diverseness of items . It can exist used to store glasses , bottles , and other bar ware , glassware, napkins, as well equally bar tools and accessories .
When yous do information technology yourself and build the habitation bar, y'all can salvage yous a lot of money. If you were to buy a pre-made outdoor bar, it would likely toll you hundreds, if non thousands, of dollars. With a DIY outdoor bar, y'all tin can easily spend a fraction of that amount.
I recall this bar would be a great project for anyone who is new to woodworking. Y'all will demand at to the lowest degree ii people in some of the building pace, and then go a friend to help! The joints and cuts are simple and beginner friendly. If you lot follow the step-by-step instructions, you will be able to avoid mistakes, waste, and in the end create the bar table without much hassle or worry.
Plans for DIY bar chairs can be constitute here.
Plans for the DIY patio sectional sofa can exist found here.
Plans for the DIY outdoor java table can be found here.
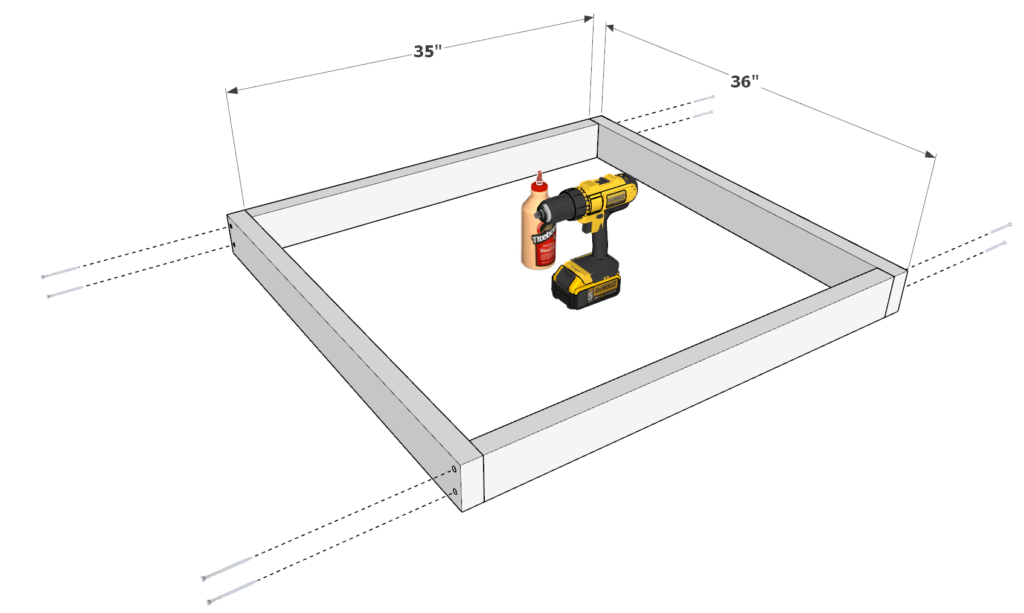
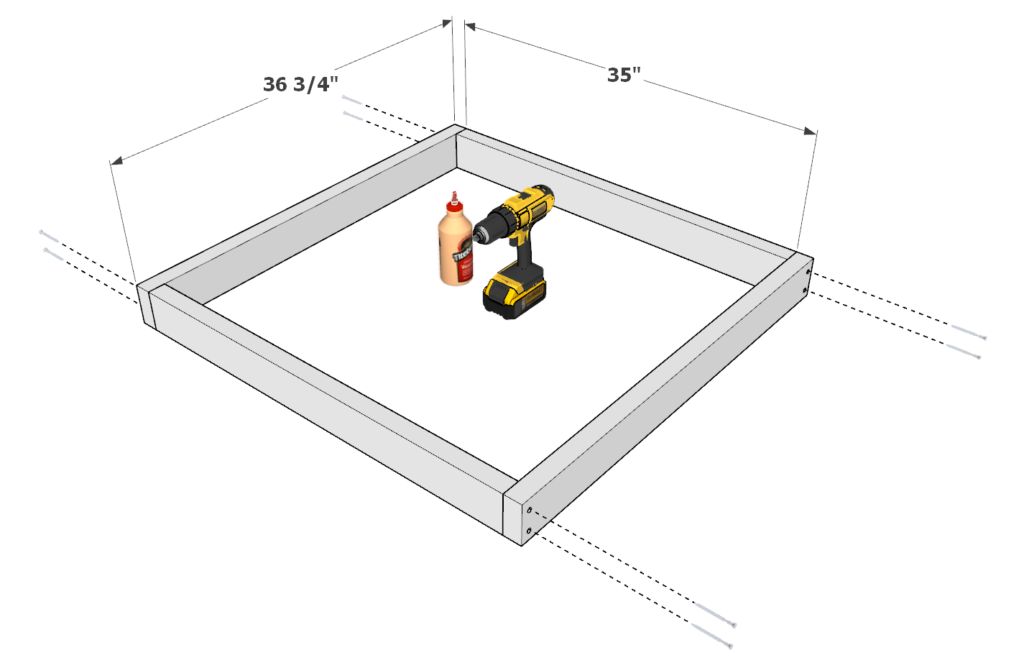
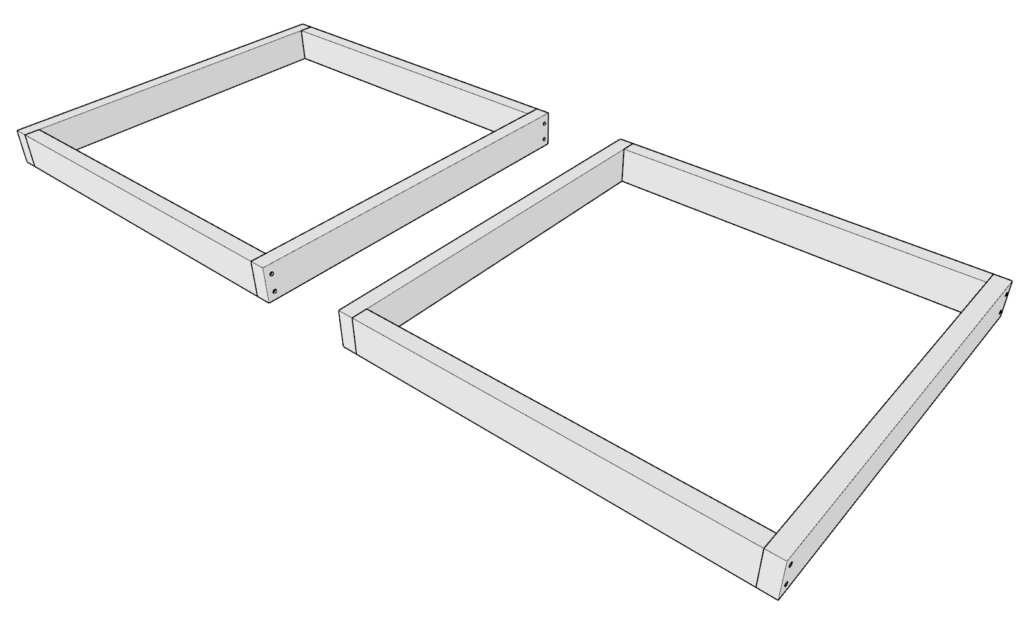
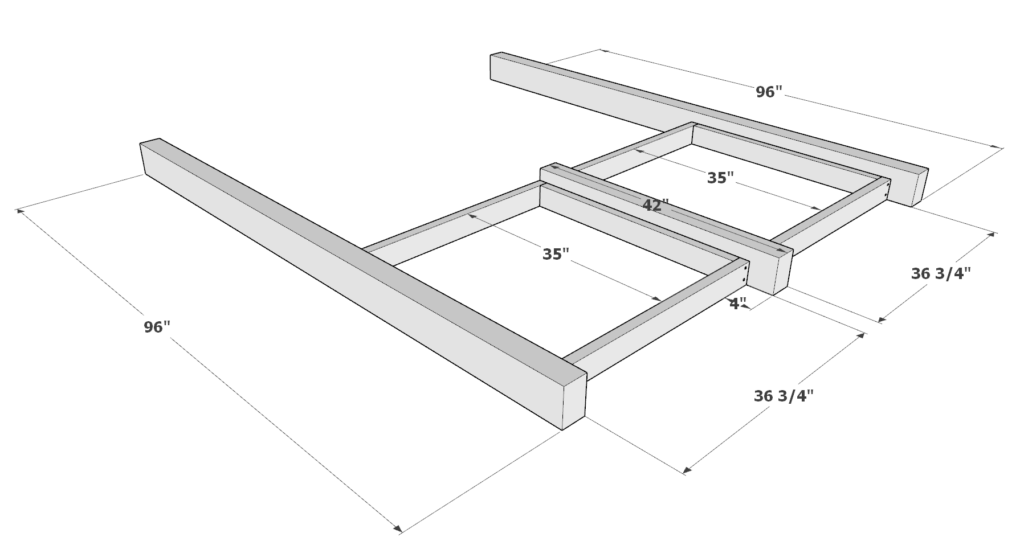
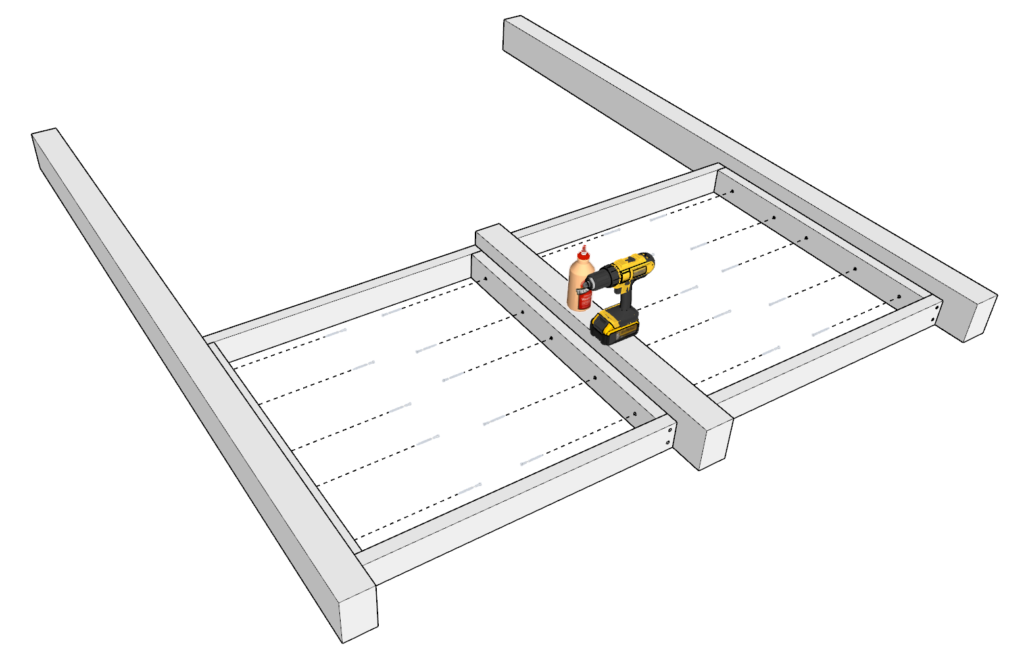
Next, take one 42 inch 4×6 lumber piece, ii 96 inch 4×6 lumber pieces, and the ii larger 35 x 36-3/iv inch frame pieces you but assembled and arranged them as shown below.
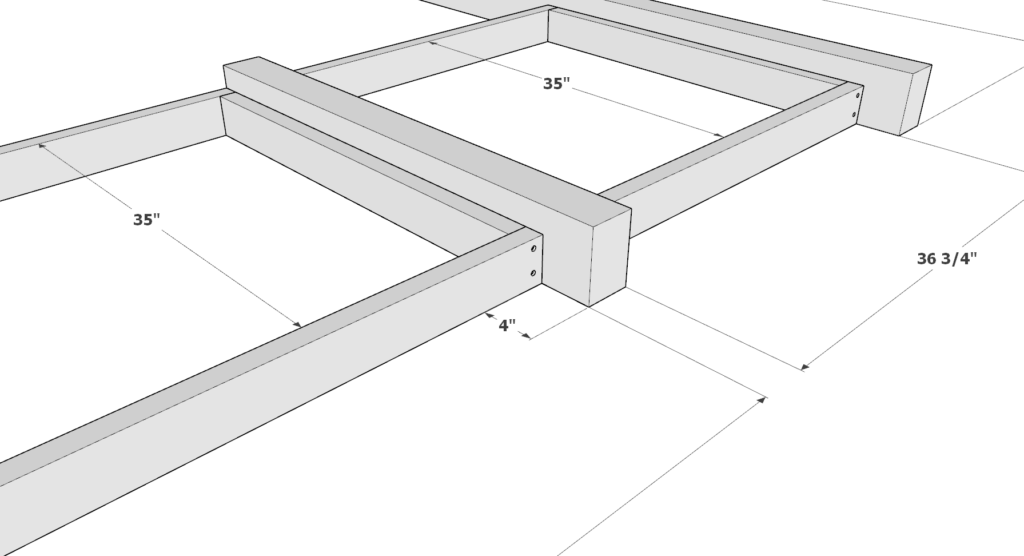
Make certain that the legs/pillars are indented by 4 inches as shown beneath.
Add together glue to all areas that will be joined together.
Predrill holes and add together 3.v inch screws to all areas that need to be joined.
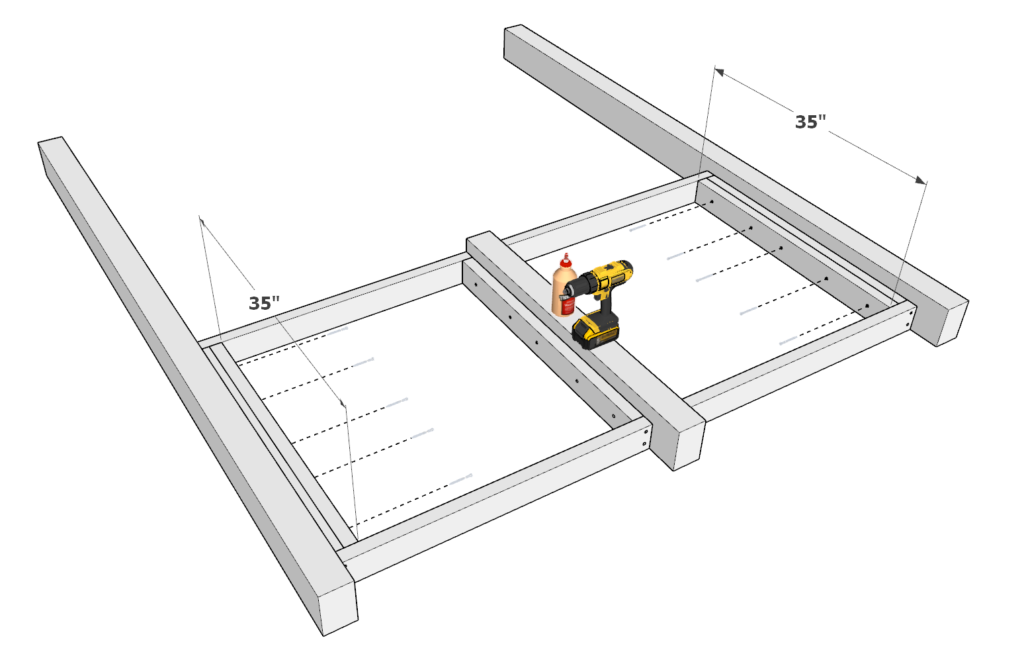
Next, accept two more 35 inch two×iv lumber pieces and add them to the outdoor bar frame equally shown in the final picture in this pace. Again, add gum, predrill, and add 3.5 inch screws.
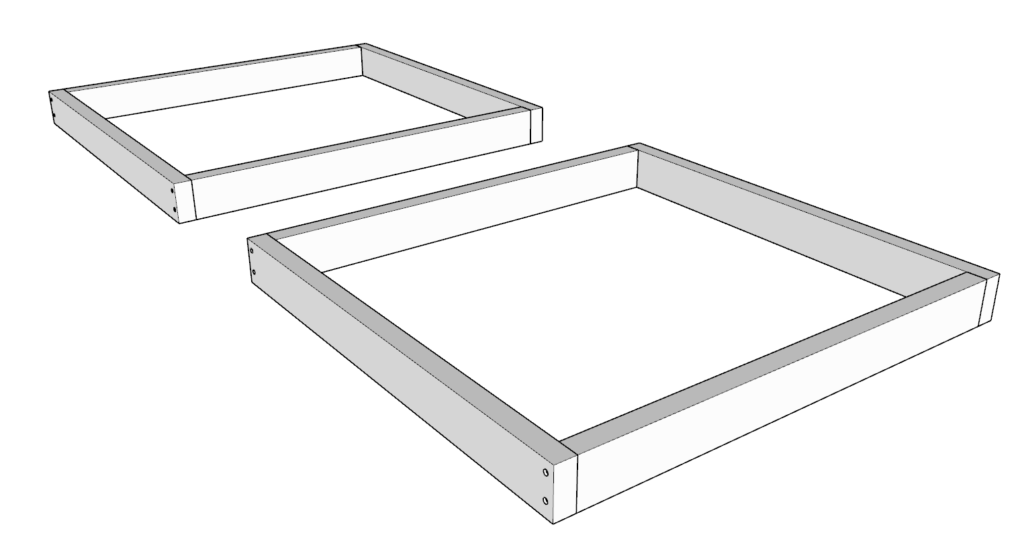
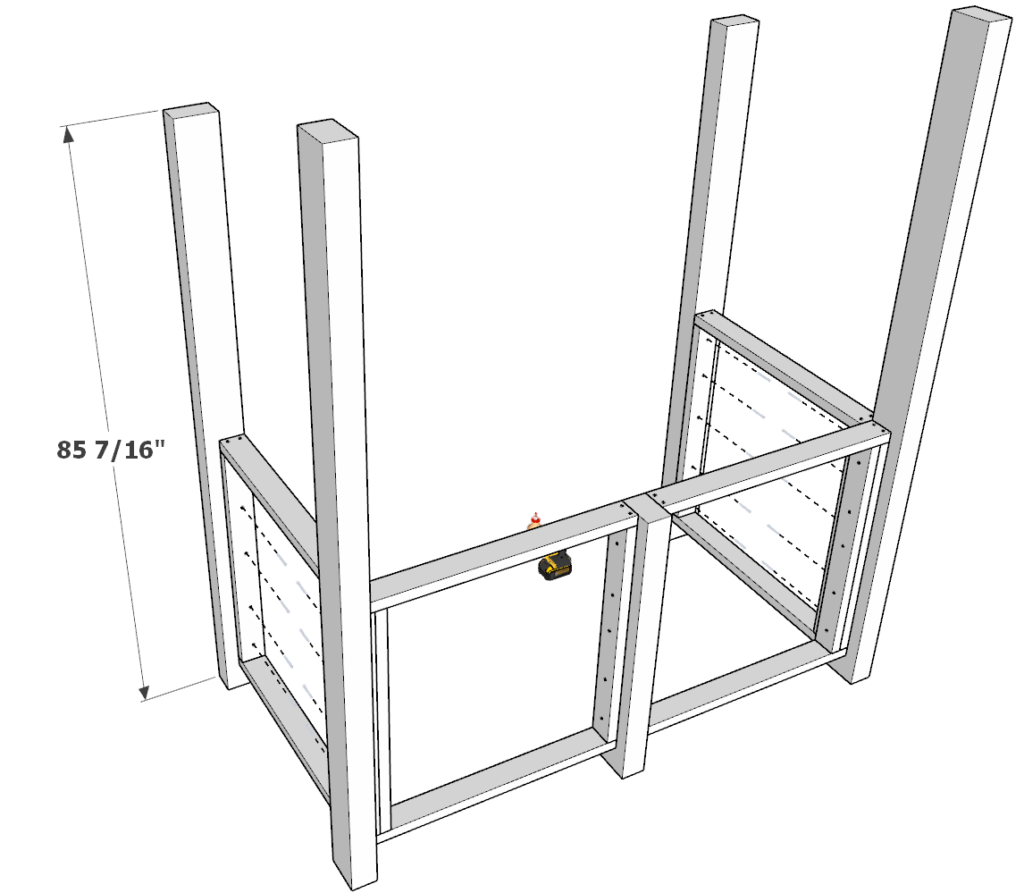
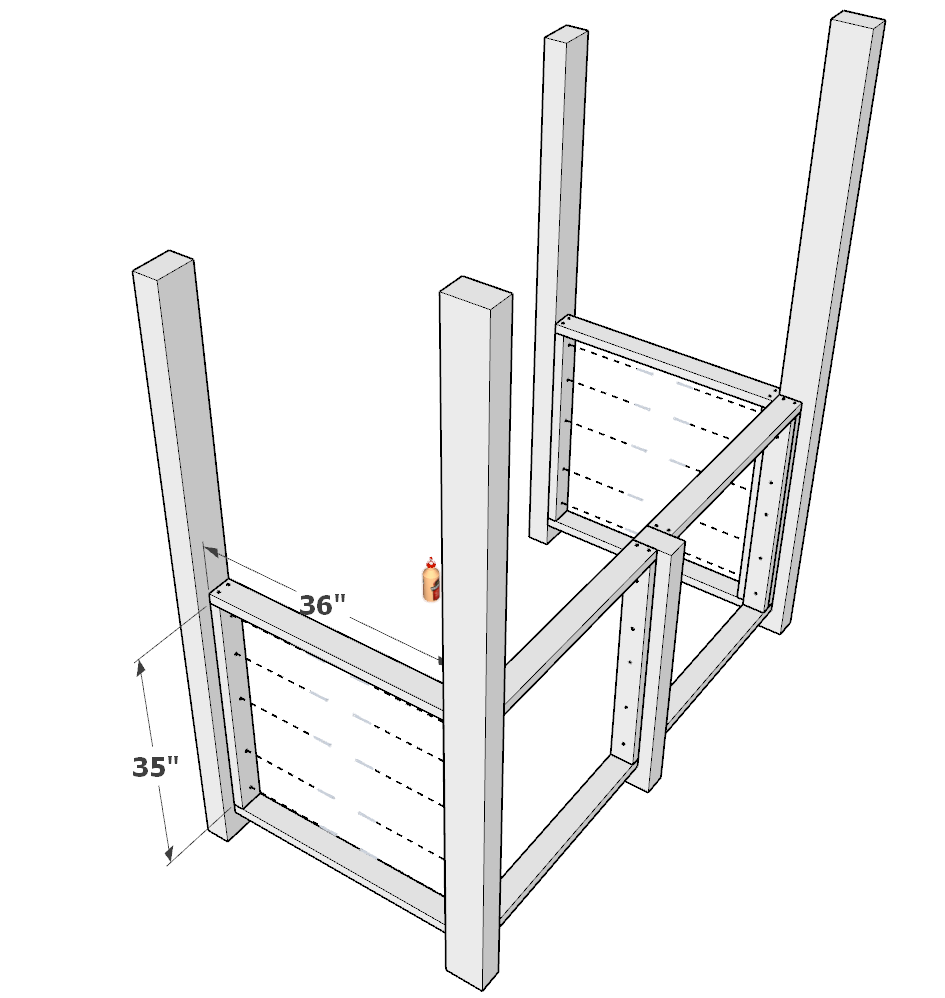
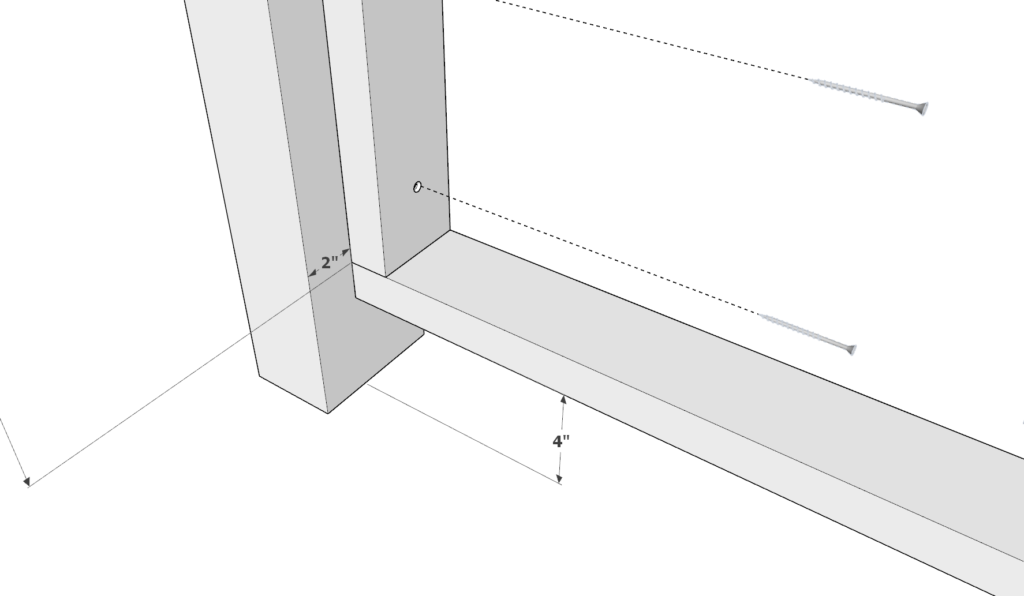
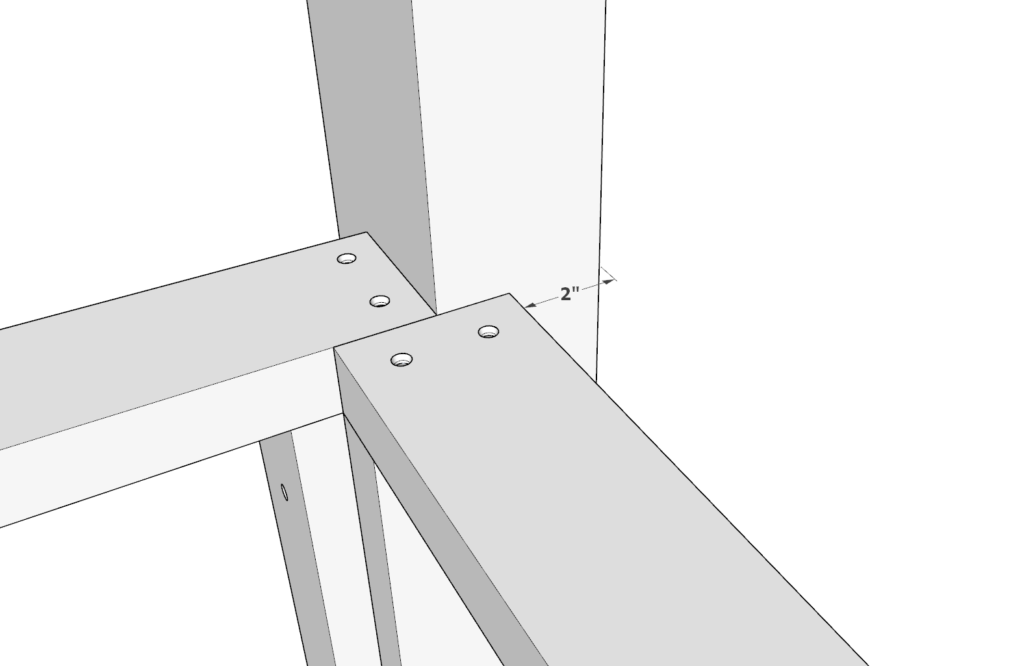
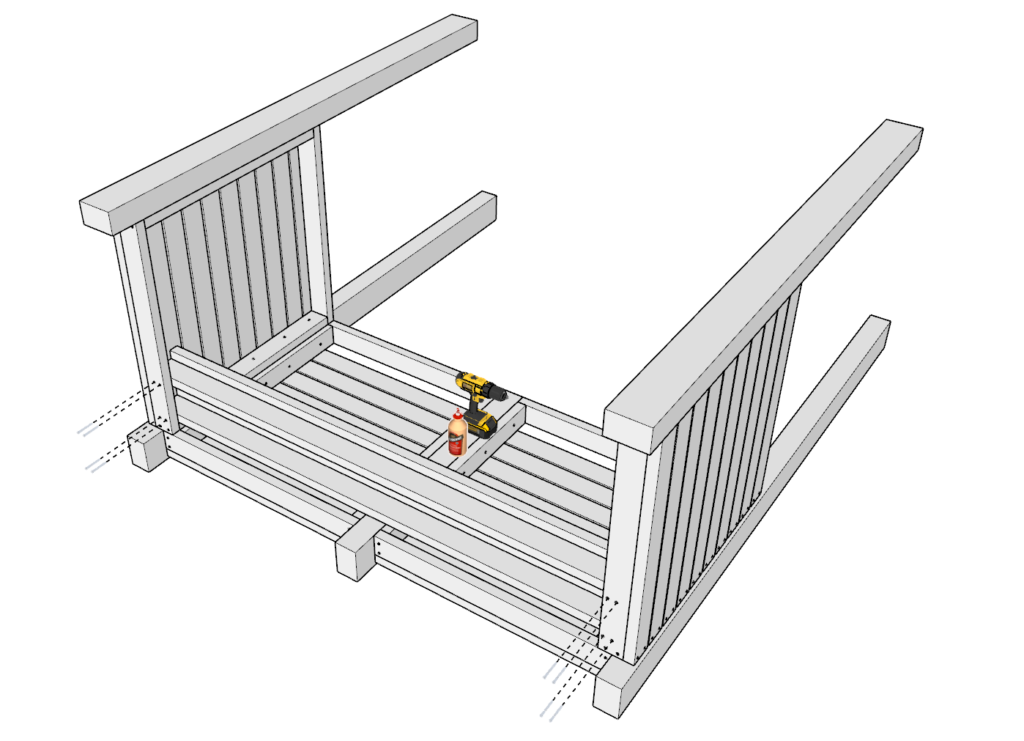
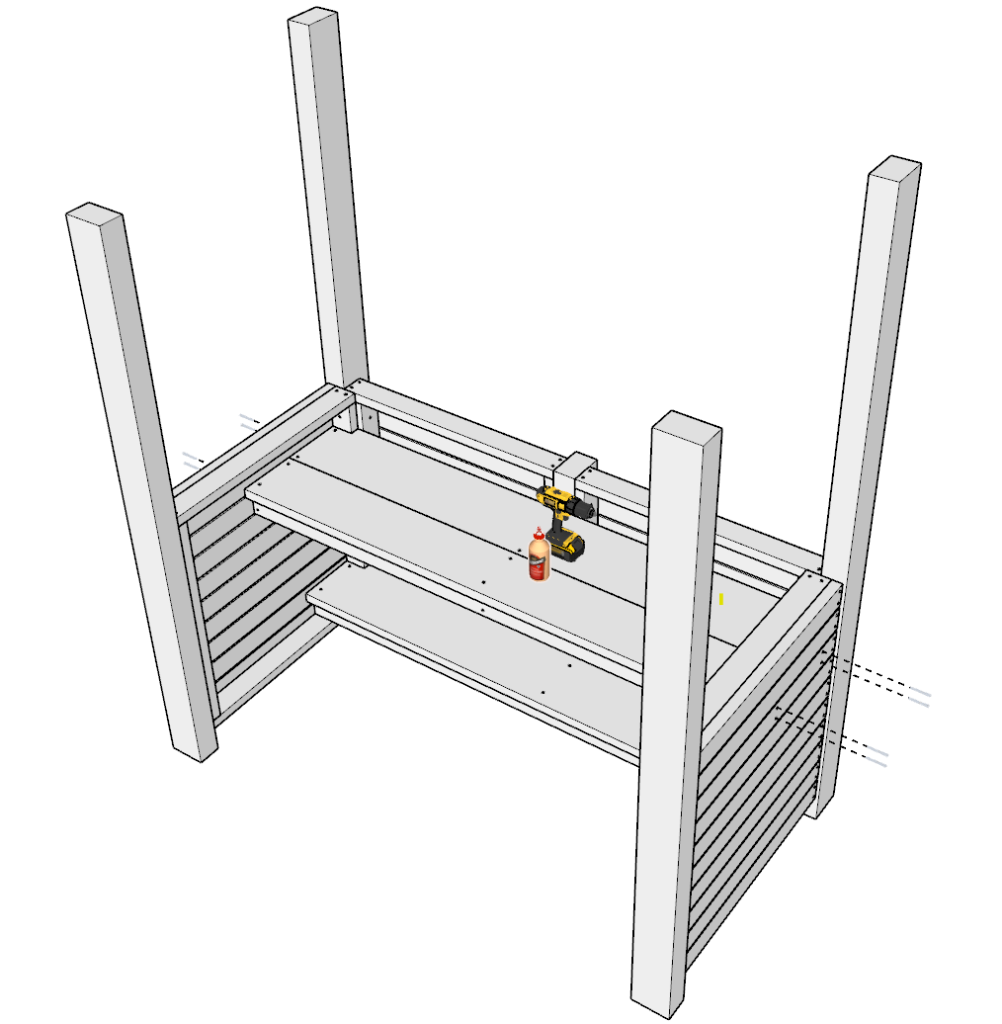
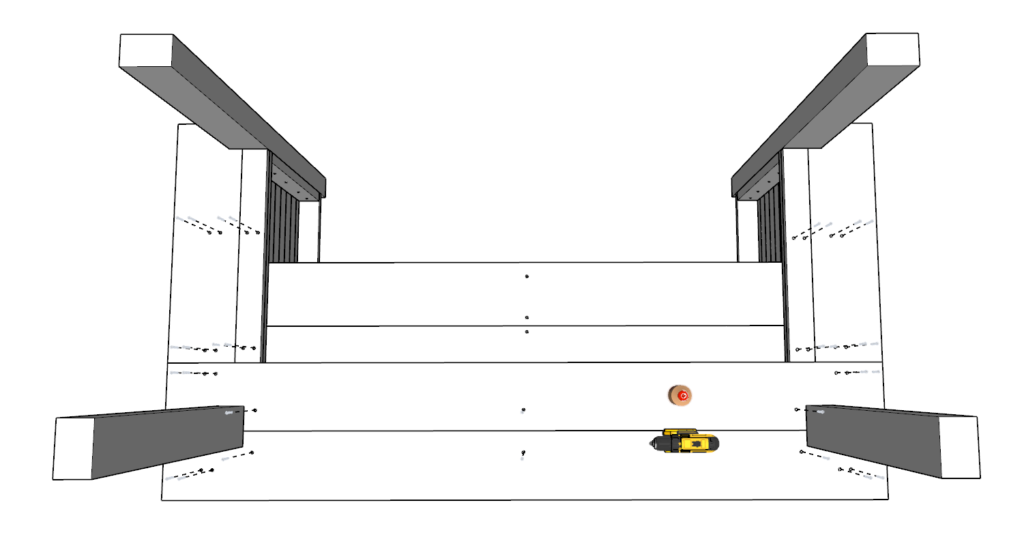
Next, have the other two 36 in x 35 in frame pieces y'all assembled in the previous steps, and two 85-7/16 inch iv×six lumber pieces, and add together them to the main frame of the bar as shown below.
When adding, indent the 4×half dozen lumber pillars by 2 inches as shown below.
When adding, elevate the 36 in ten 35 in lumber frames four inches off the ground as shown beneath.
When adding the 36 in x 35 in lumber frames, indent by 2nchines from the 96 inch 4×half-dozen lumber pieces as shown below.
Secure the frame pieces with glue, predrilling, and screws.
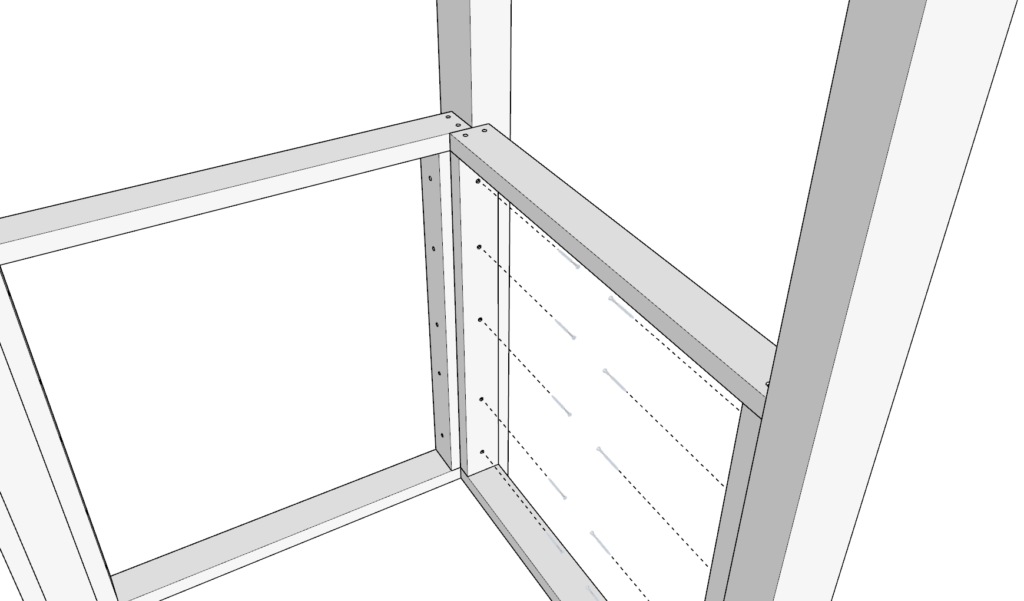
Next, add together the siding pieces.
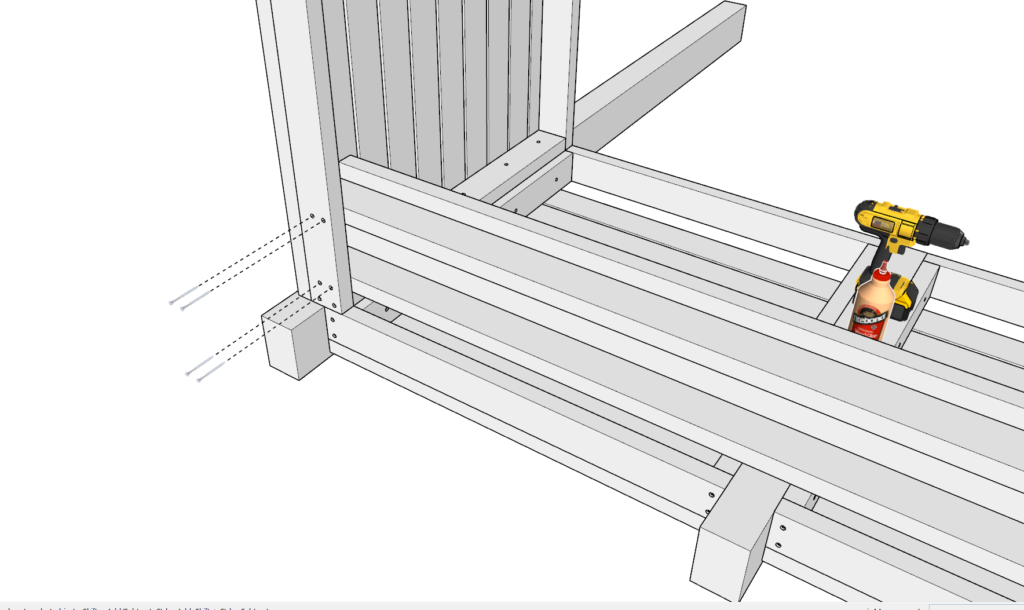
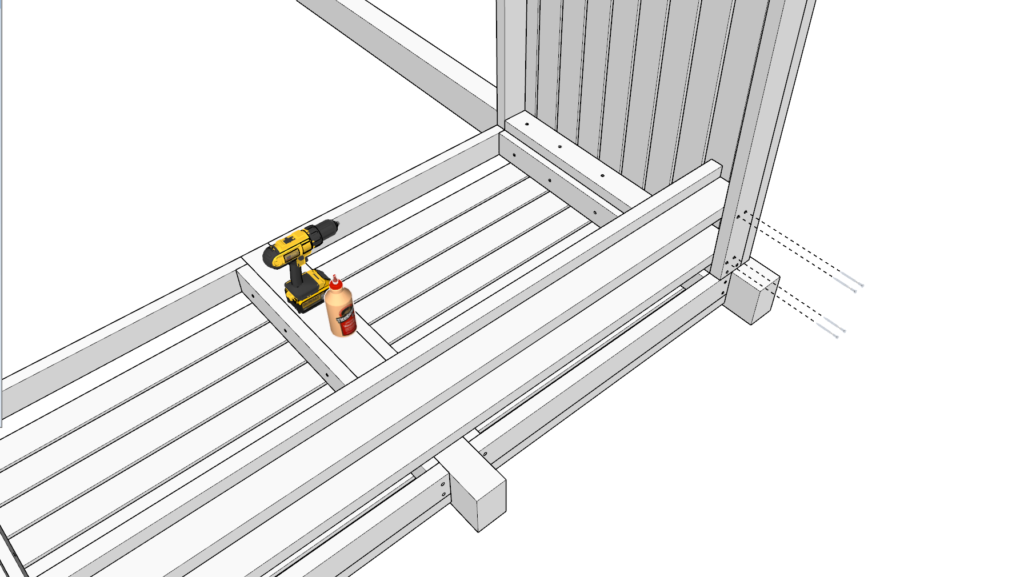
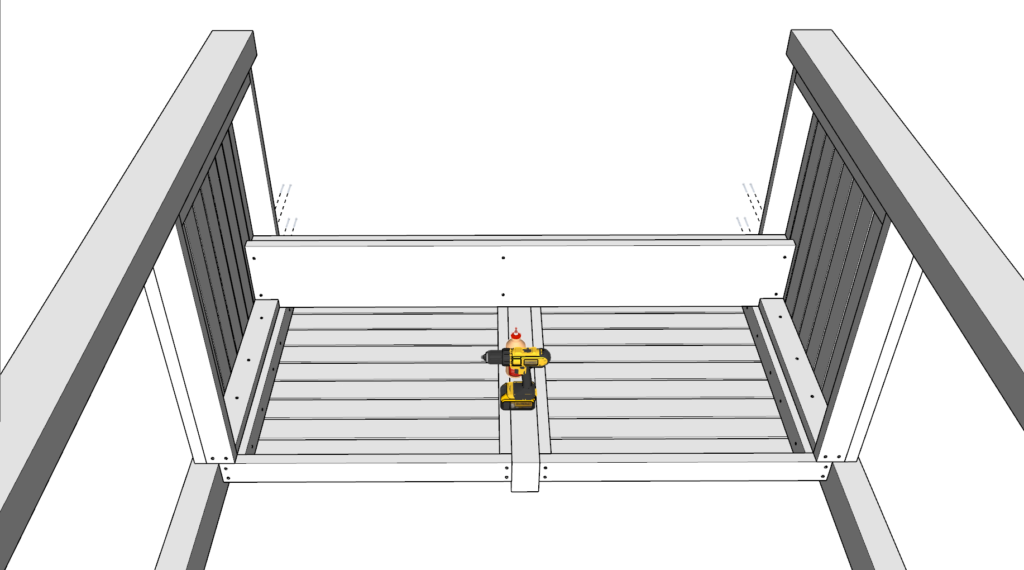
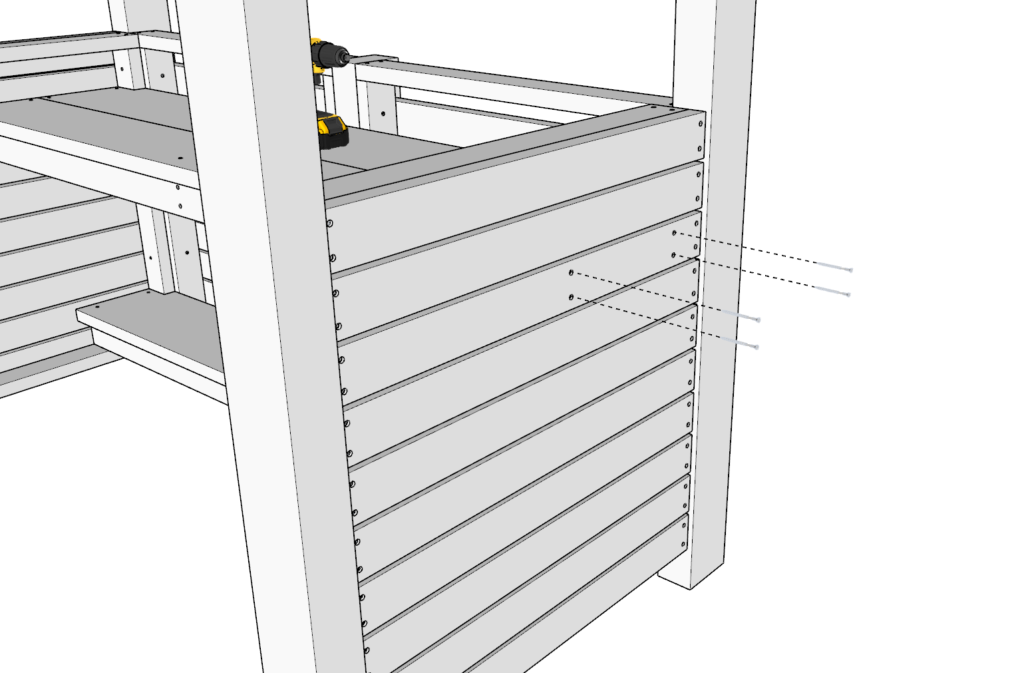
Take twenty 36 inch ii×4 lumber pieces and eighteen 36-3/4 inch 2×4 lumber pieces and add them to the outdoor bar frame as shown below.
Begin by attaching the first 2x4s on the sides of the bar flushed and leveled with the in place 2×4 frame from the previous footstep as shown below.
In the front of the bar, attach the first 2×4 lumber pieces well-nigh 3-13/16 inches down from the foursquare frame pieces in that place as shown below.
The remaining pieces need to be almost five/xvi inches autonomously.
To space out the pieces evenly you can use a spacer. This spacer can exist cut from a bit piece of wood on hand.
Every bit before, gum, predrill, and add three.5 inch screws.
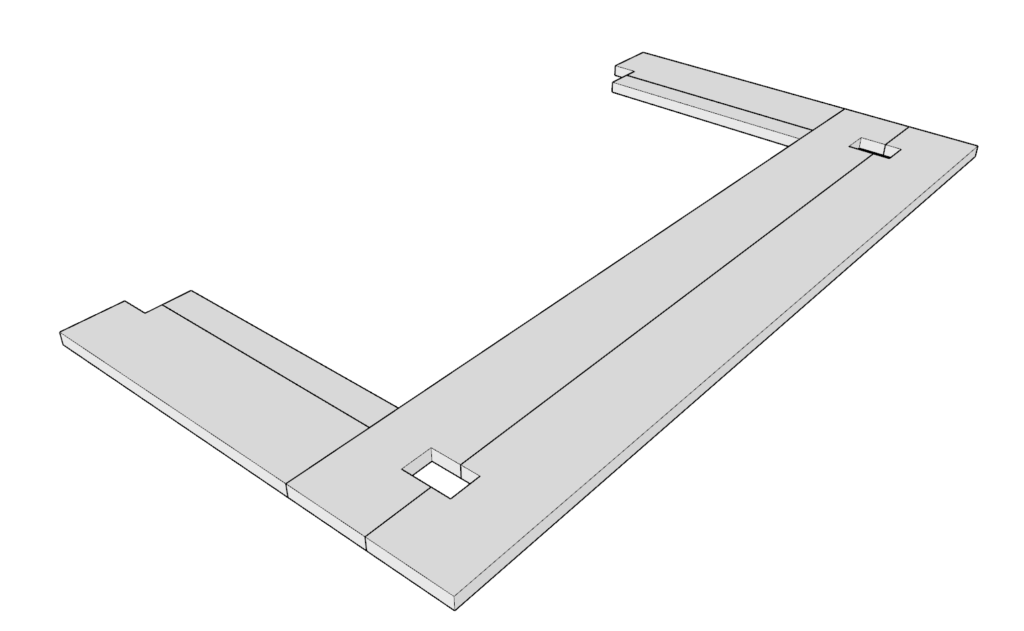
Next, built the top and bottom shelf of the DIY bar.
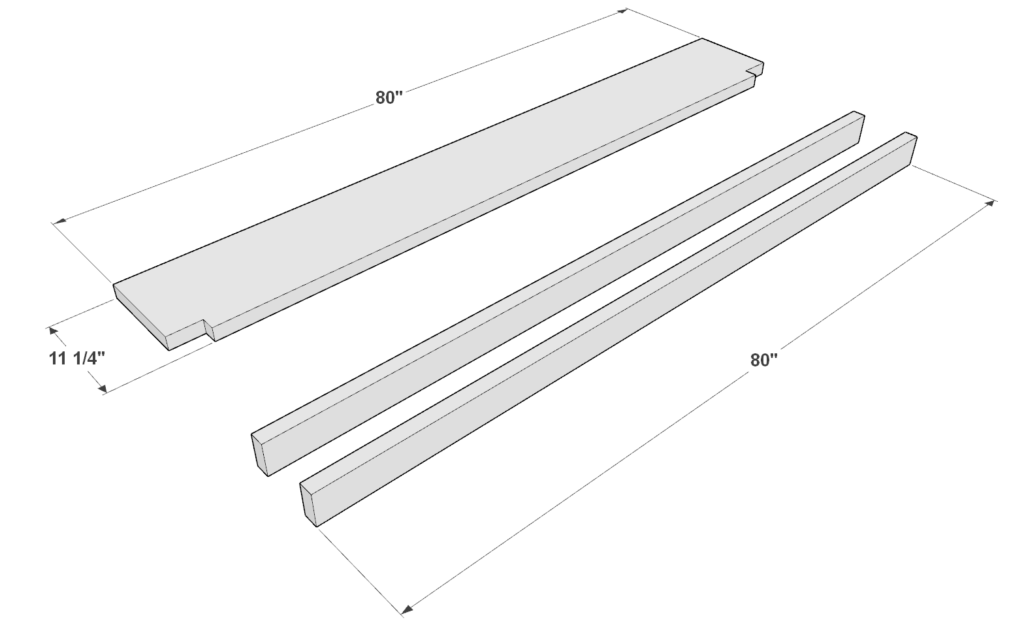
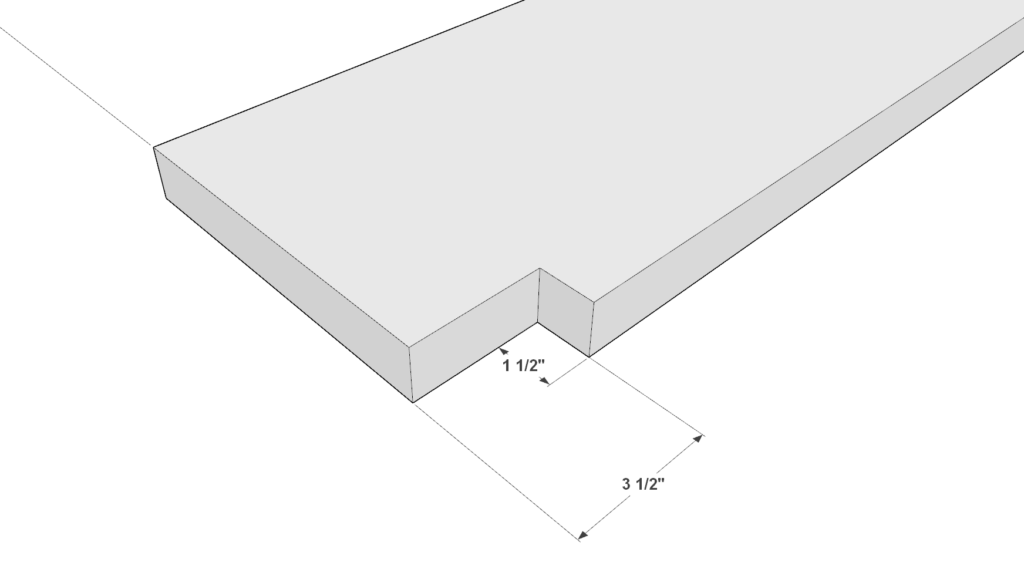
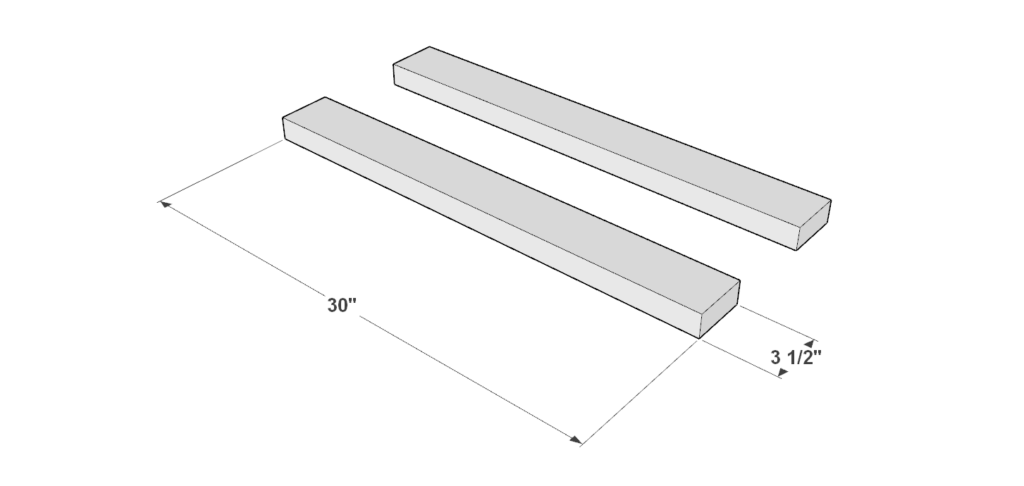
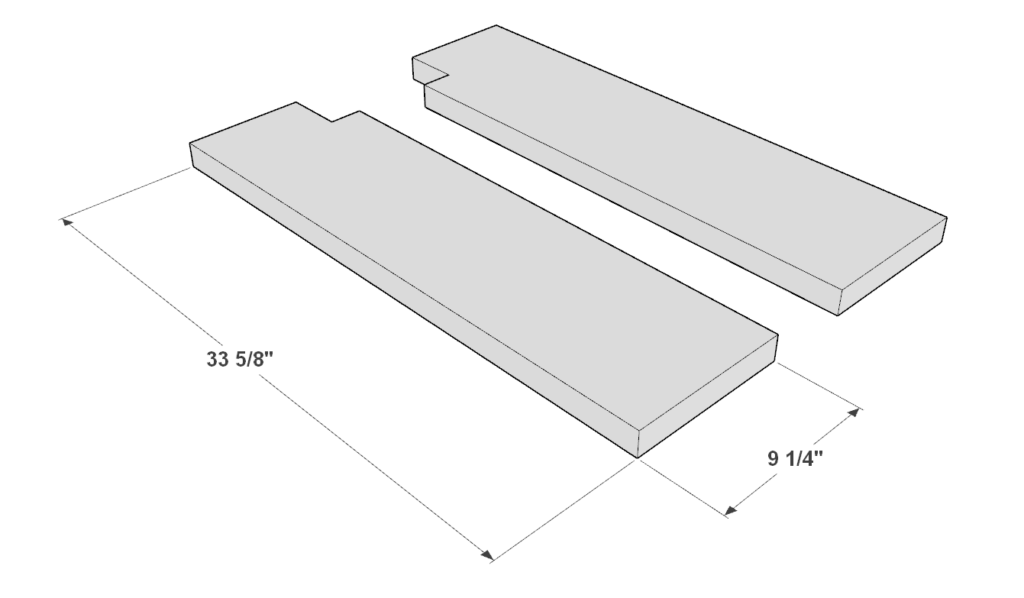
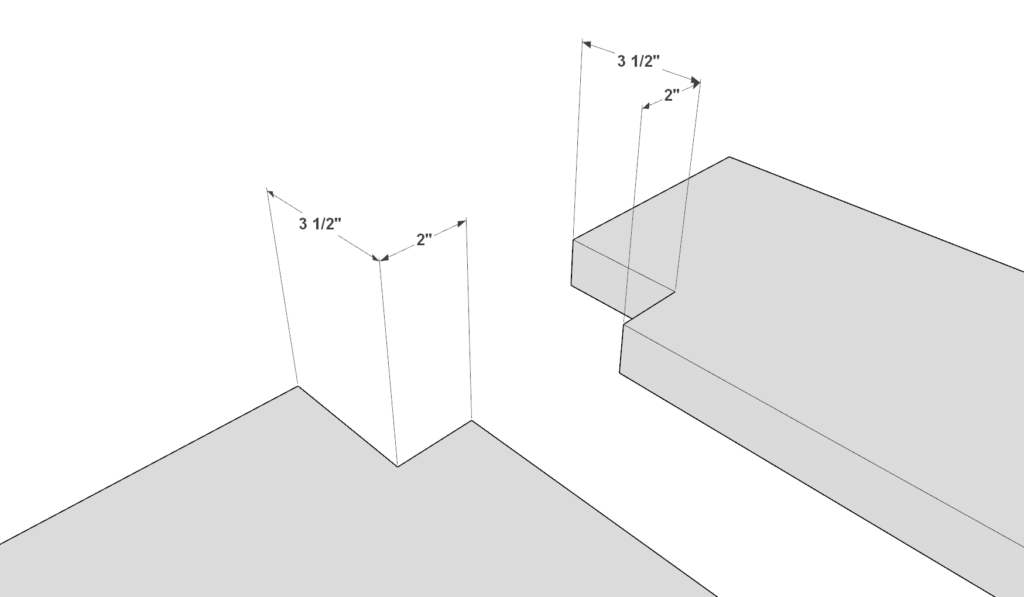
Start past making the bottom shelf. Take one lxxx inch 2×12 lumber pieces and two eighty inch 2×4 lumber pieces. Cut a small-scale 1-1/2 inch x 3-1/two inch indent into the 2×12 lumber board on both sides equally shown below.
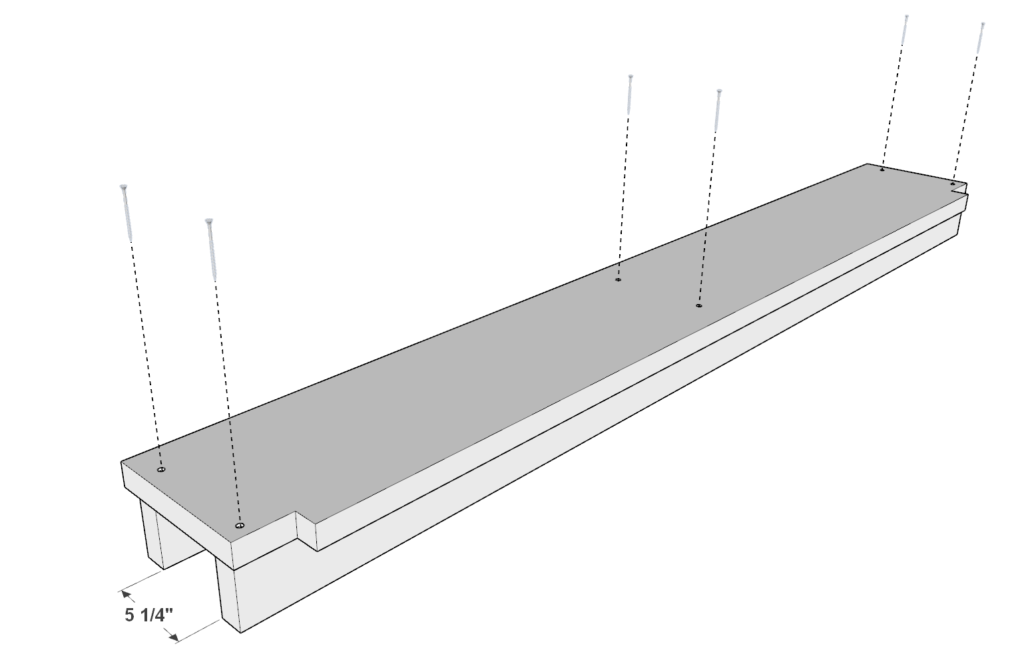
Adjacent, attach the 80 inch 2x4s to the eighty inch two×12 equally shown below. Infinite out the 2x4s about five-1/4 inches autonomously.
Predrill, add glue, and add 3.5 inch screws.
Next, brand the top shelf of the bar.
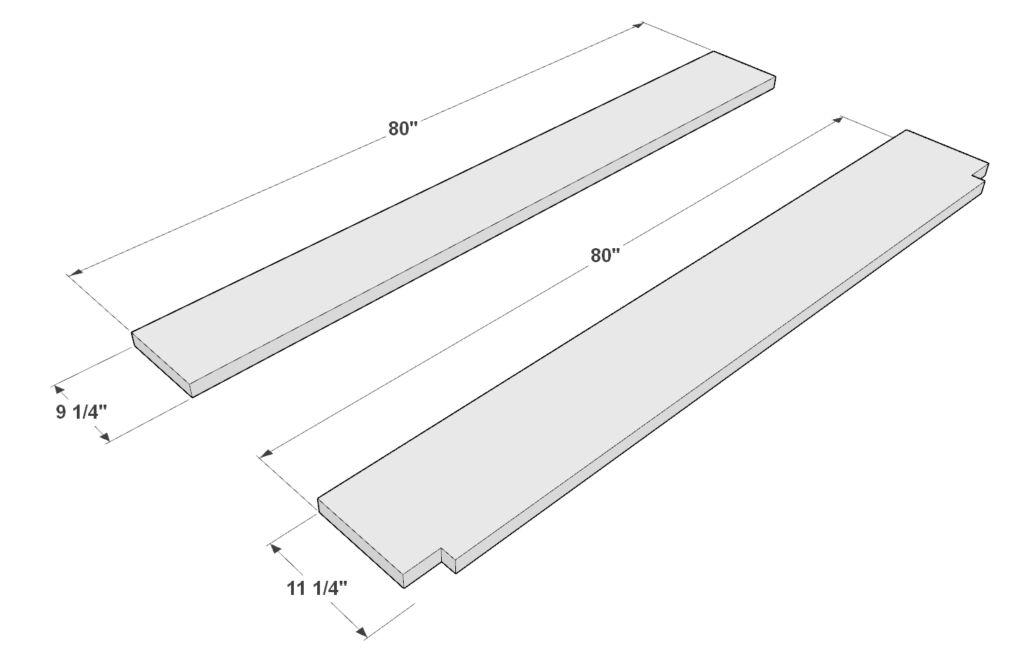
Have on lxxx inch 2×10 boards and 1 80 inch ii×12 inch boards. Cut a 1-1/2 inch x 3-one/two inch indent into the 2×12 lumber board on both sides as shown beneath.
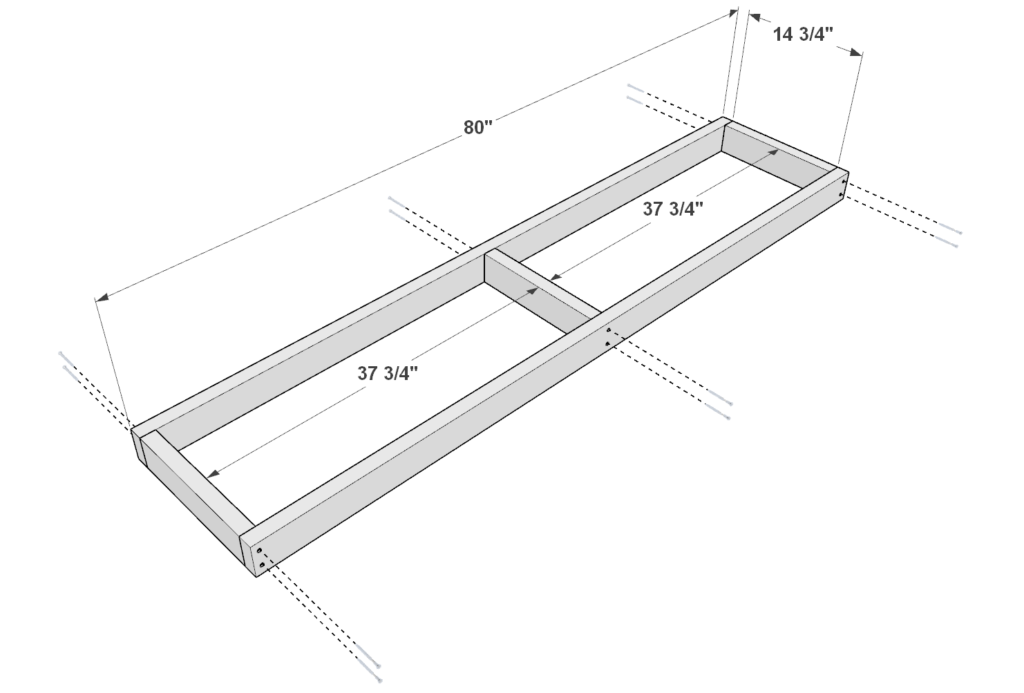
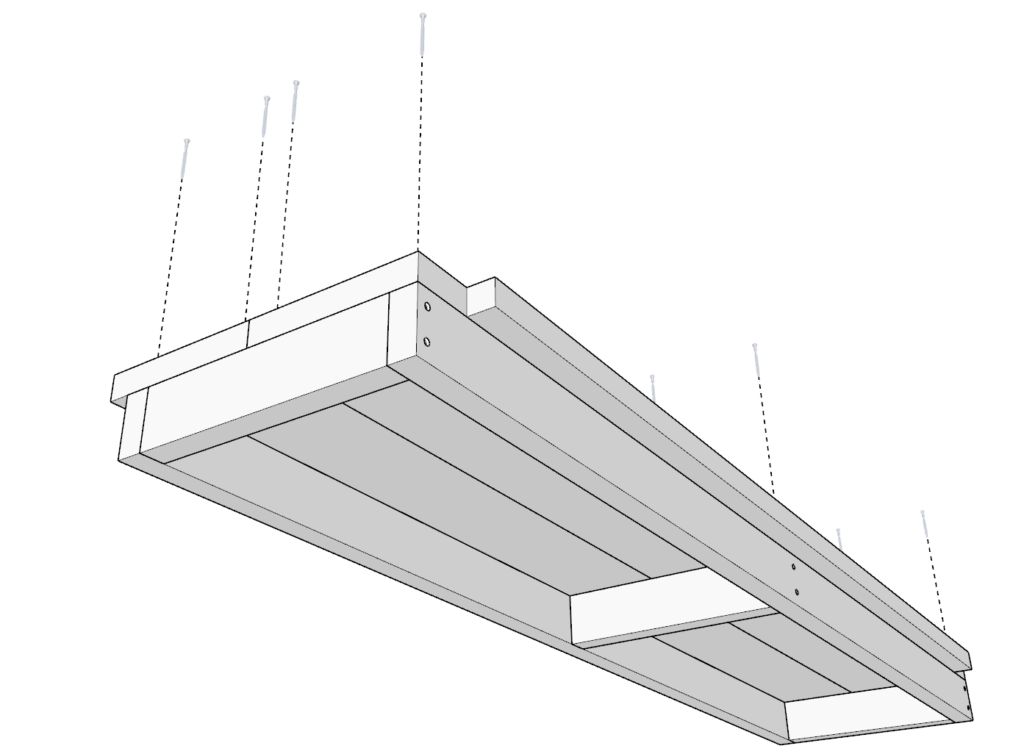
Adjacent make a pocket-sized shelf frame by taking two 80 inch 2×iv lumber pieces and three 14-iii/4 lumber pieces and adjust them every bit shown beneath. Join them by predrilling, calculation mucilage, and adding iii.v inch screws.
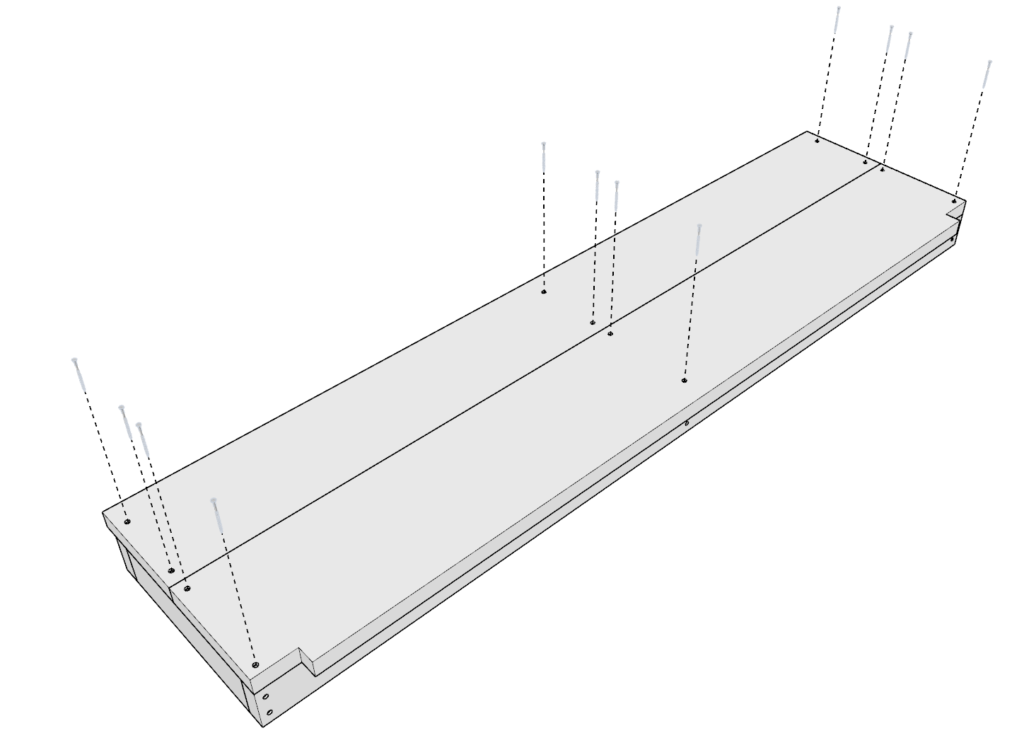
Lastly, attach the 80 inch 2×10 board and the 80 inch ii×12 lath to the shelf frame as shown beneath. Predrill, add glue, and add screws.
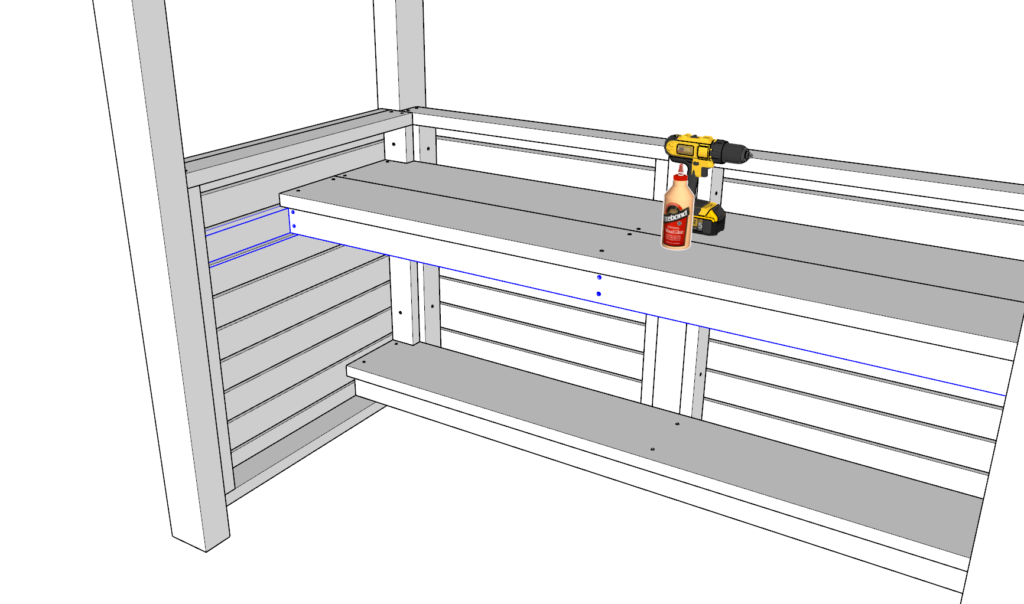
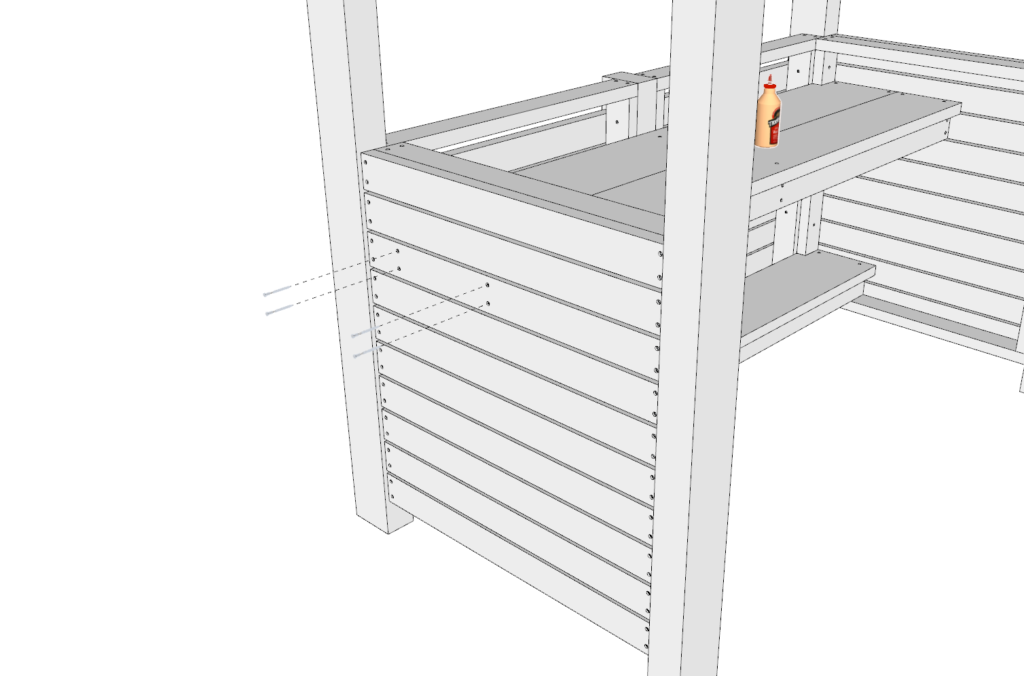
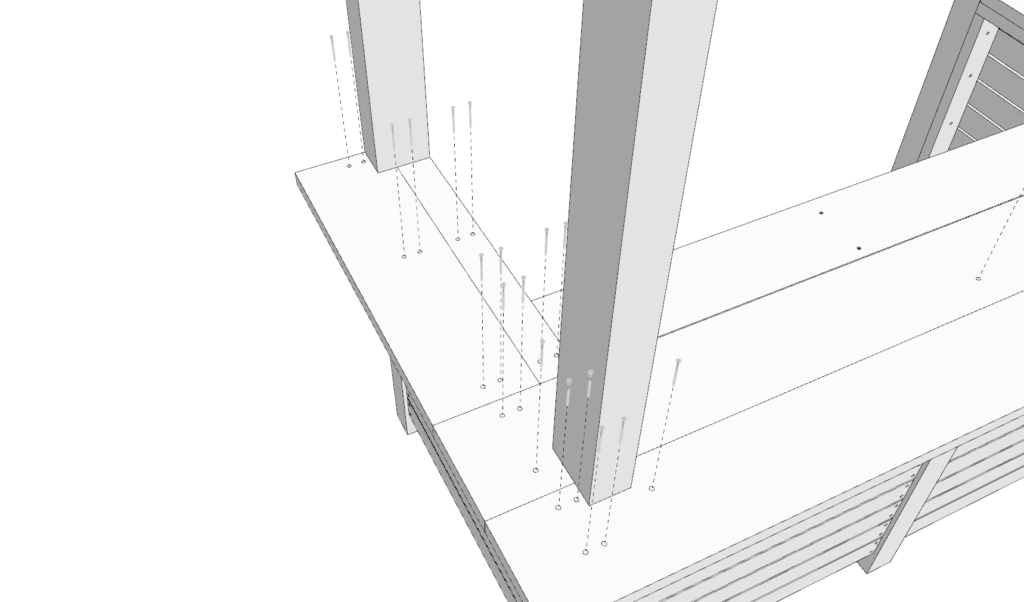
Next, adhere the bottom shelf by tilting the bar on the side. Place the shelf into position as shown below. Make sure the 1-1/ii x three-1/2 indented parts of the board lock into identify. Add together glue, predrill, and secure the shelf with 3.5 inch screws as shown beneath.
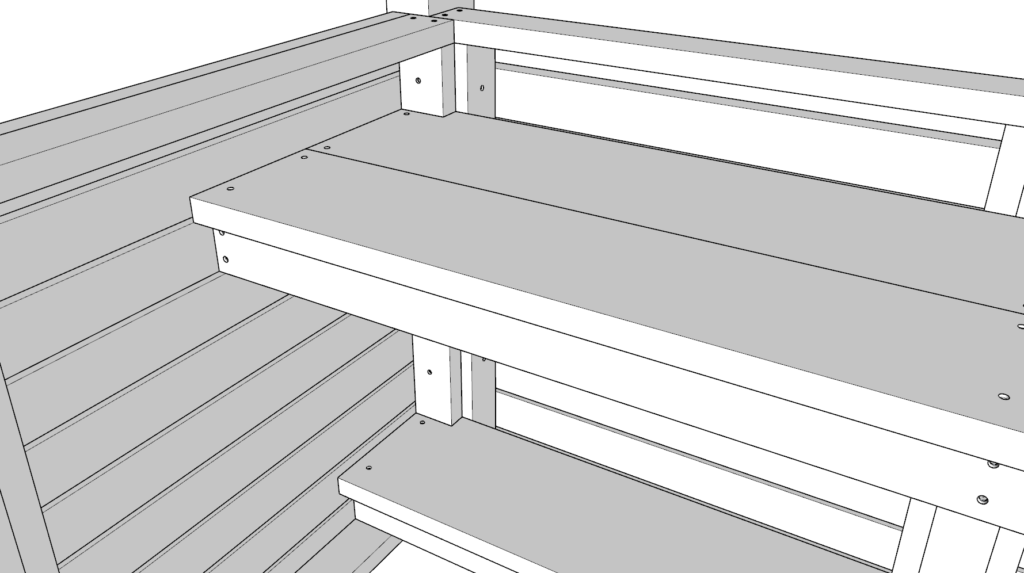
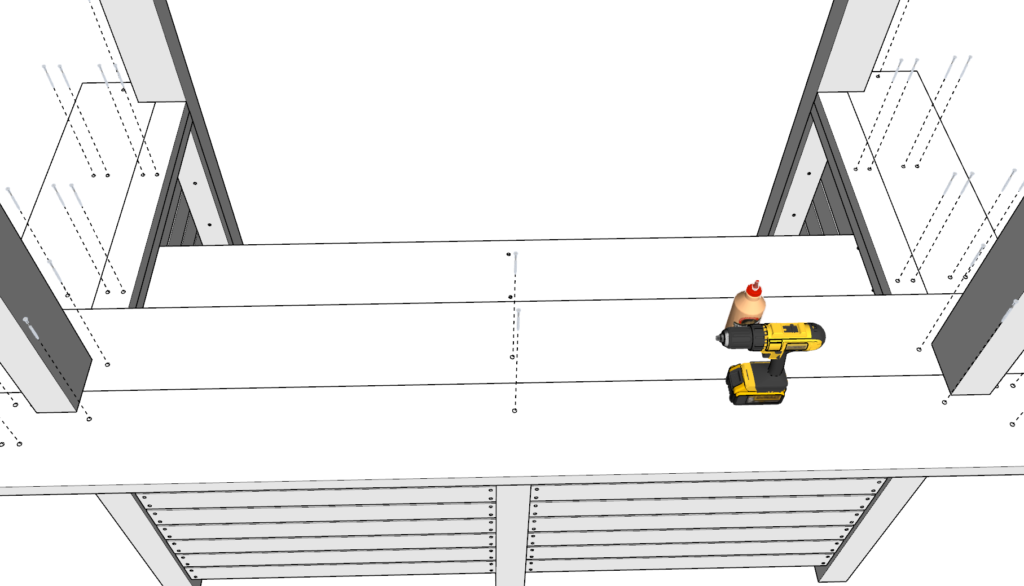
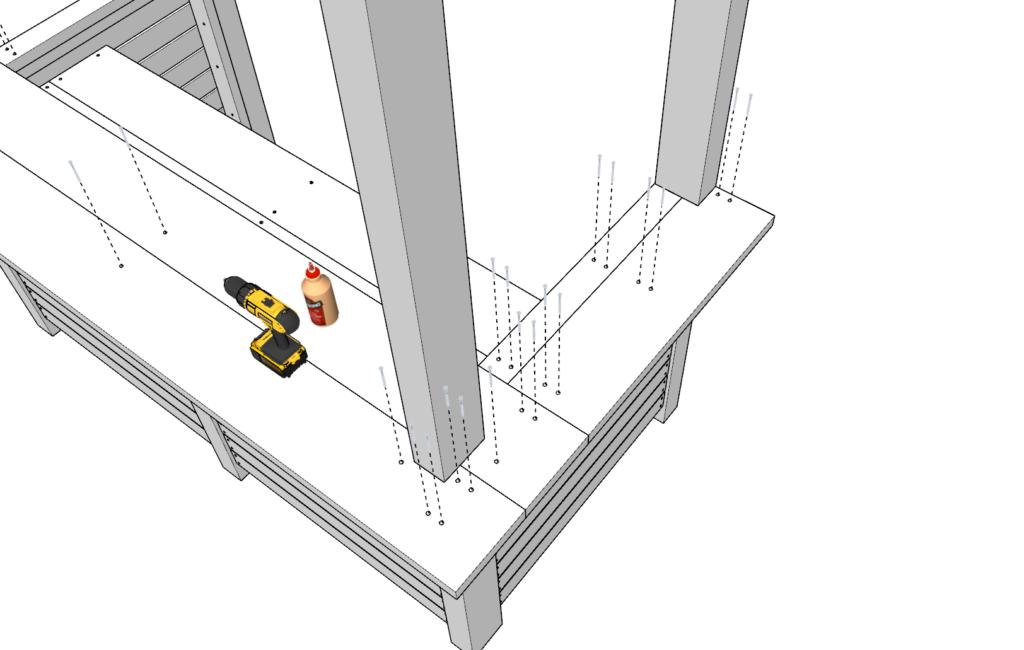
Next, adhere the top shelf. The superlative shelf frame needs to be aligned with the 3rd 36 inch 2×4 siding pieces as highlighted in blue below. In one case the shelf is aligned and the indented part of the shelf has locked into identify, then predrill directly though the siding pieces, add together glue, and add 3.5 inch screws.
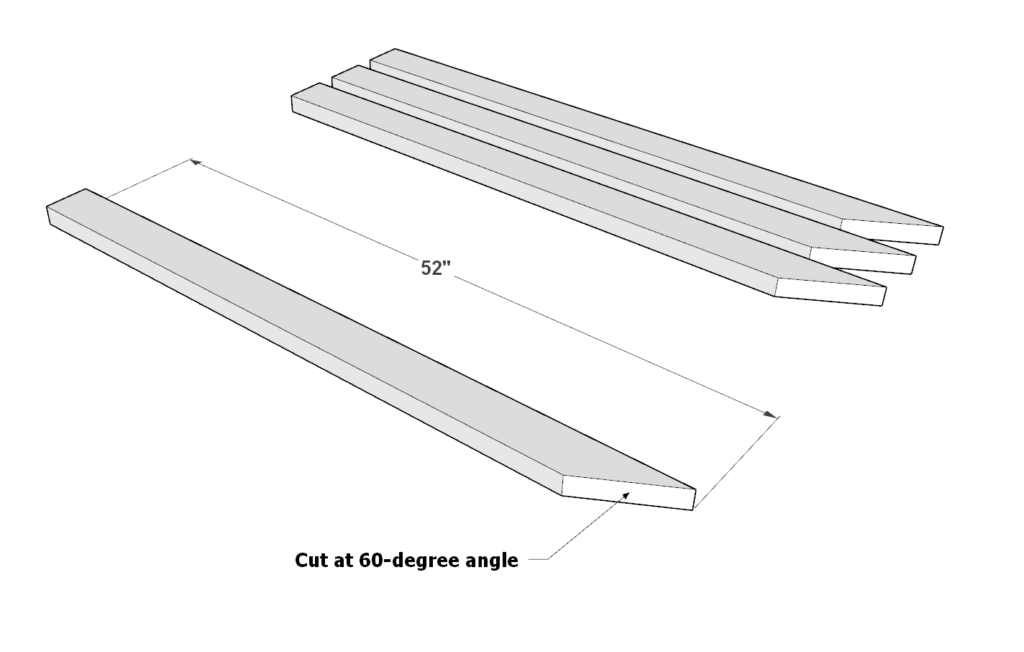
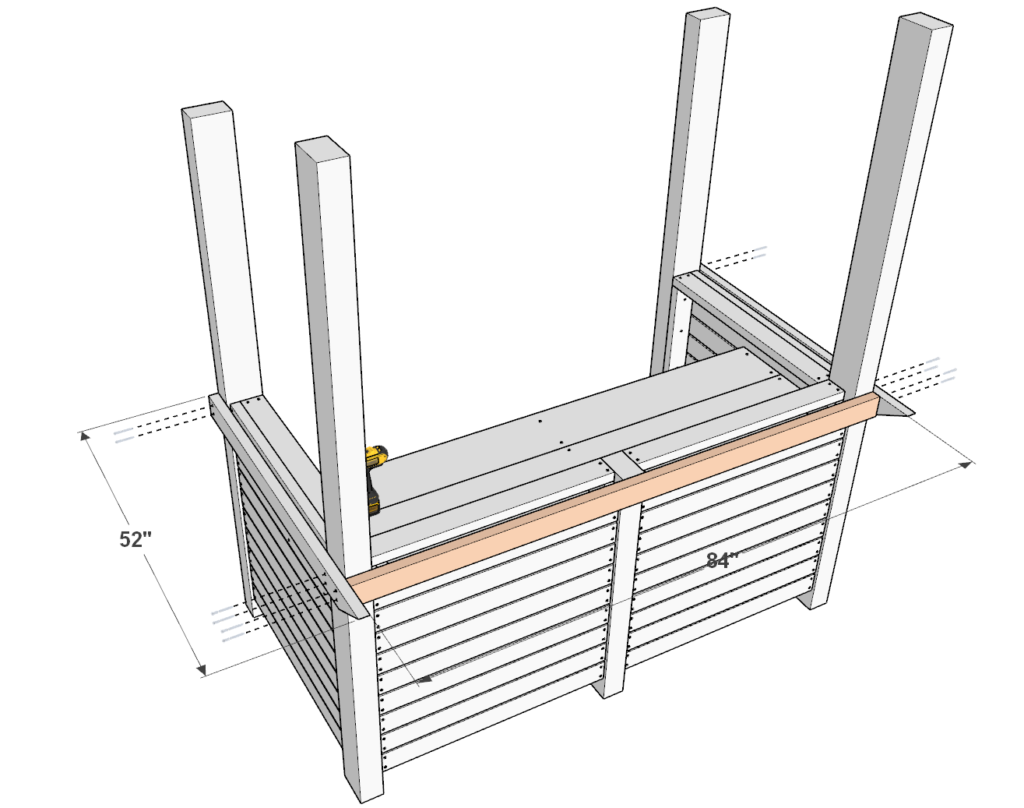
Next, add the bar meridian supporting lumber pieces.
Cut 4 52 inch two×4 lumber pieces with one finish cut at threescore-degrees every bit shown below.
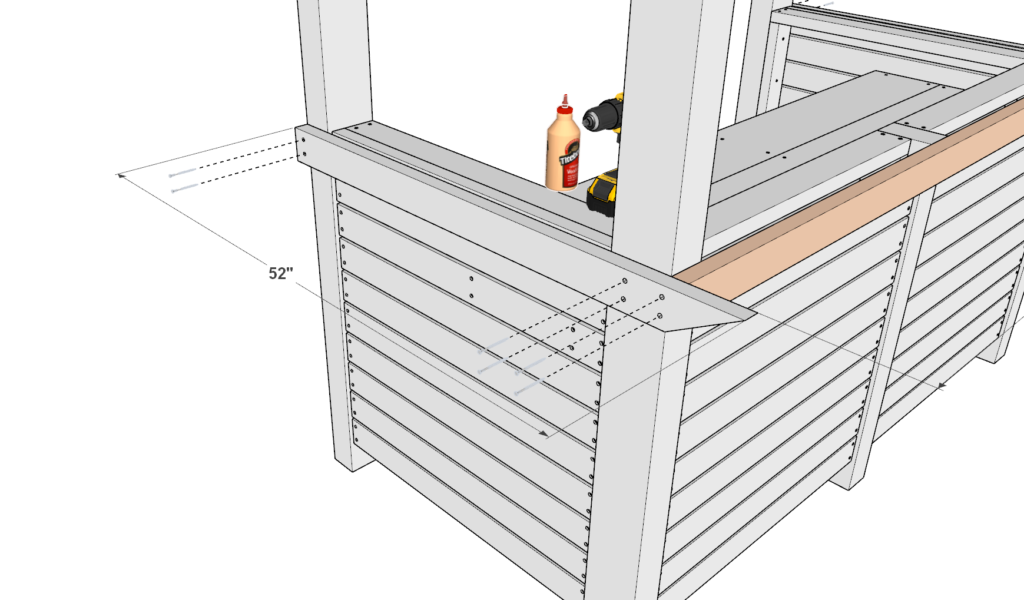
Next add ii 52 inch 2×4 lumber pieces and one 84 inch two×4 lumber piece (highlighted in orange) to the bar frame as shown below.
Predrill holes, add glue to all areas being joined, and add 3.5 inch screws.
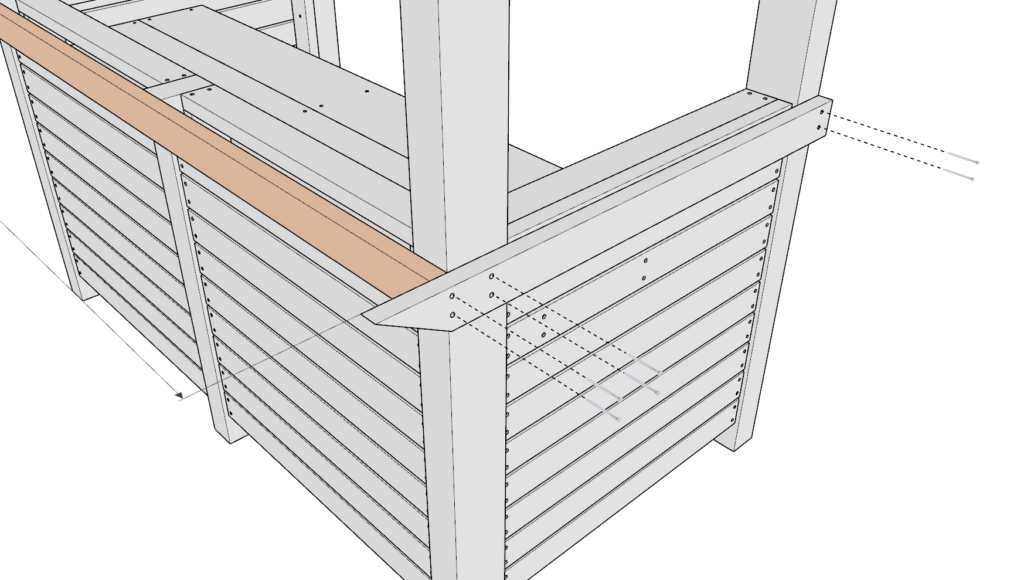
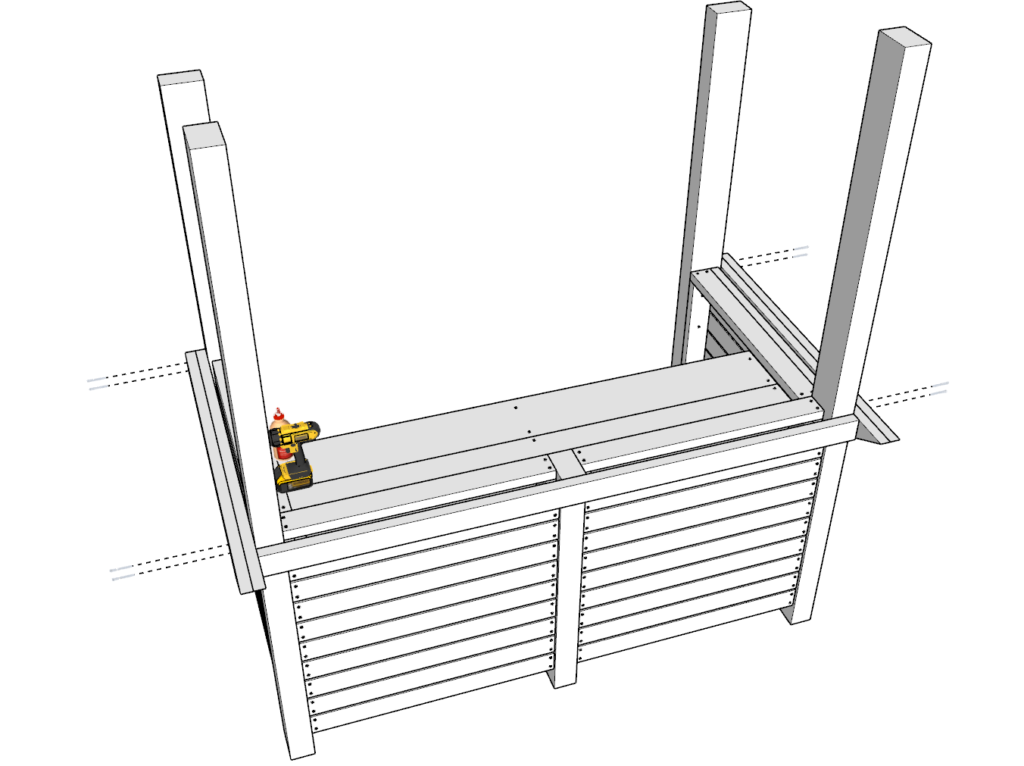
Next, add ane more layer of 52 inch ii×4 lumber pieces directly on acme on the old 52 inch ii×iv lumber pieces every bit shown below.
Add mucilage, predrill, and add three.five inch screws.
Next, add the bar top lumber pieces.
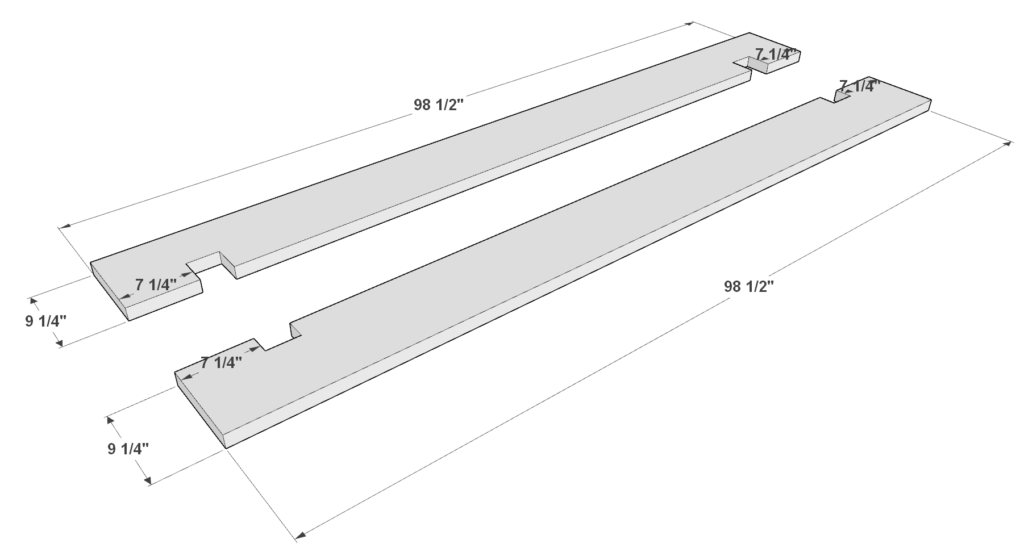
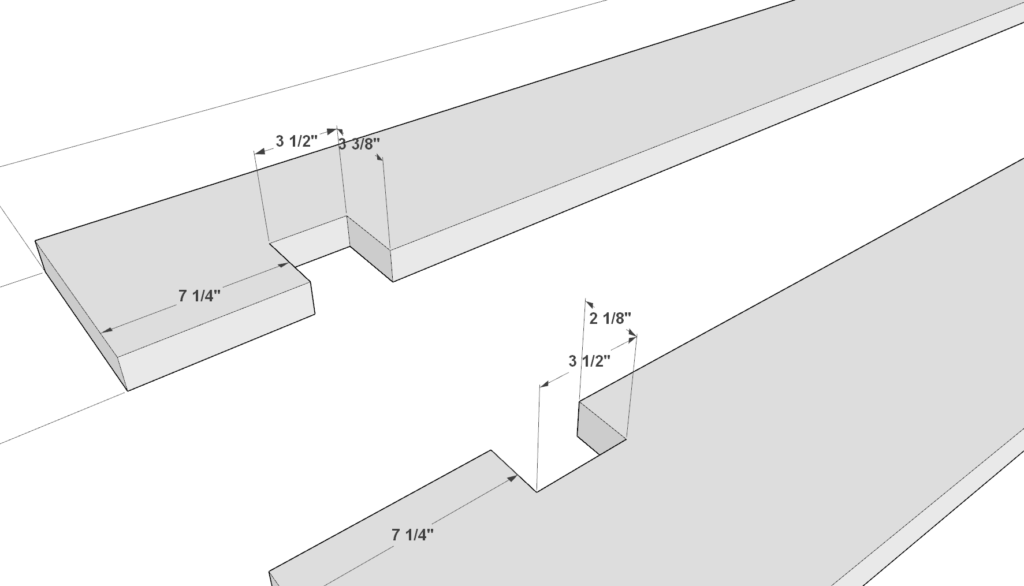
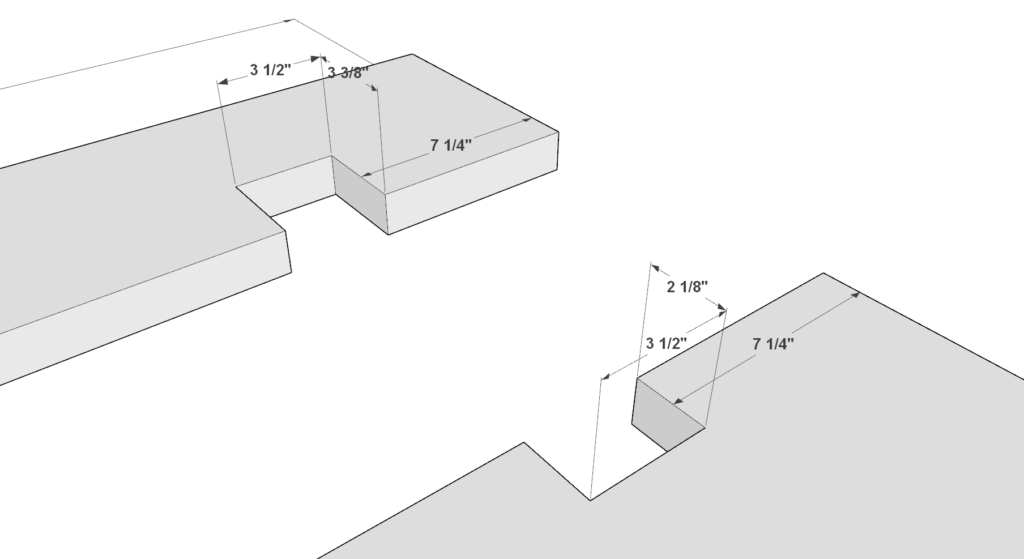
The shape of the bar superlative board must accommodate the pillars, The shape and indents are illustrated below.
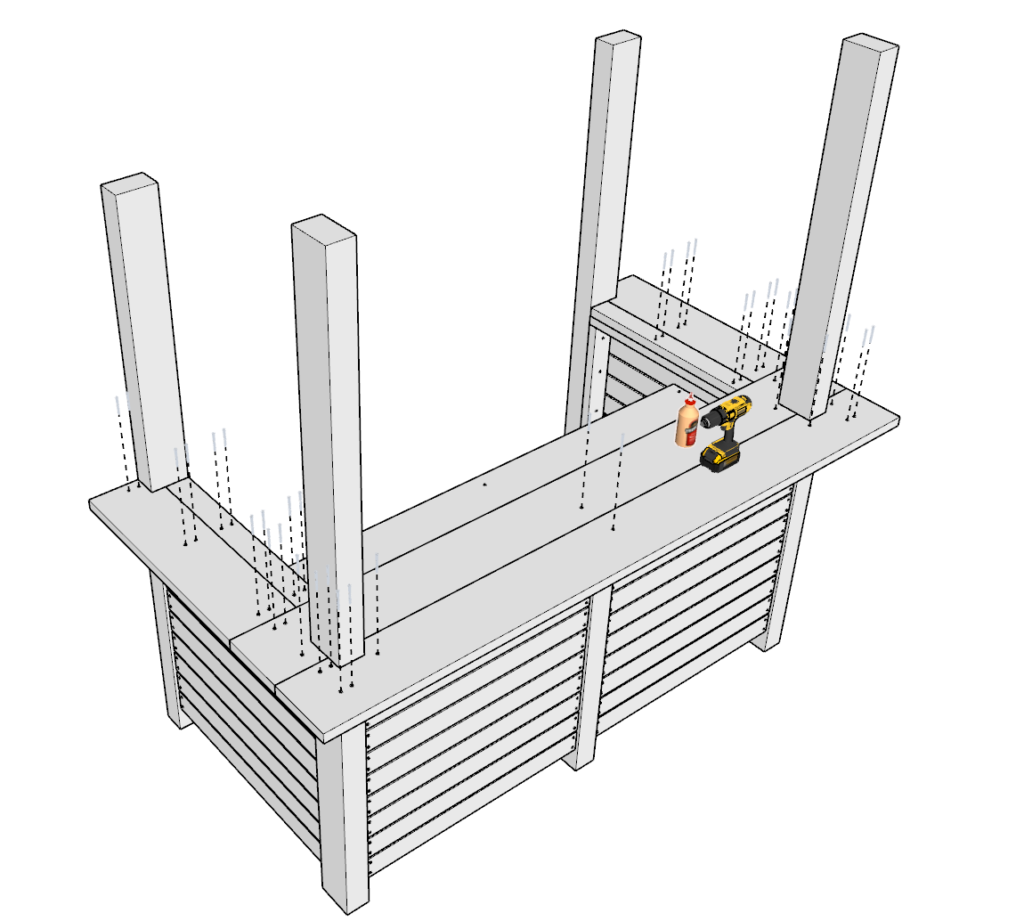
Attach the bar tiptop boards past adding mucilage, predrilling, and adding 3.5 inch screws.
The images below testify the recommended identify for the placement of the screws. You lot can however choose to place them defiantly.
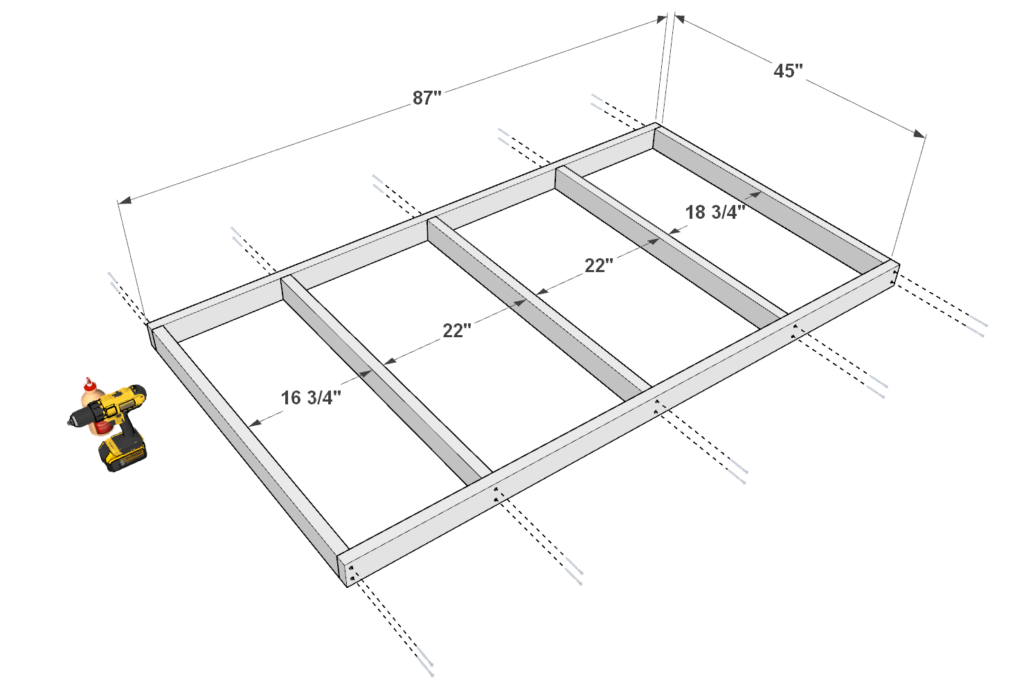
Next, assemble to outdoor bar roof.
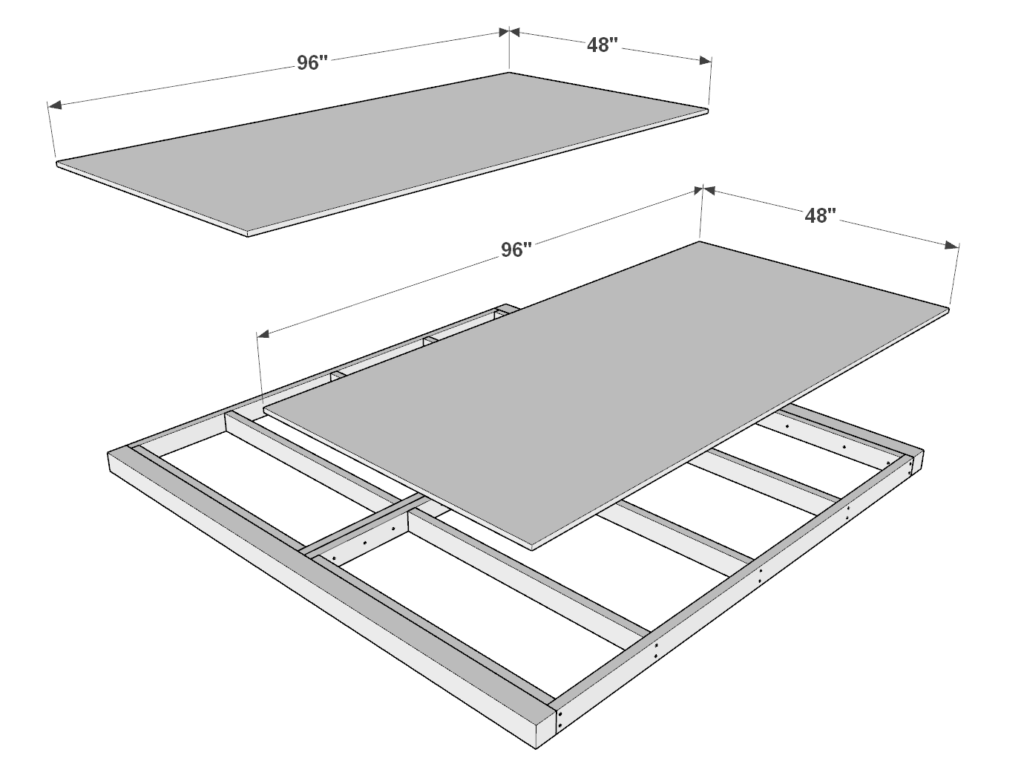
First, accept two 87 inch 2×4 lumber pieces and five 45 inch 2×iv lumber pieces and suit them every bit shown in the first image. Space them out as shown below. Bring together the 2x4s with screws and glue.
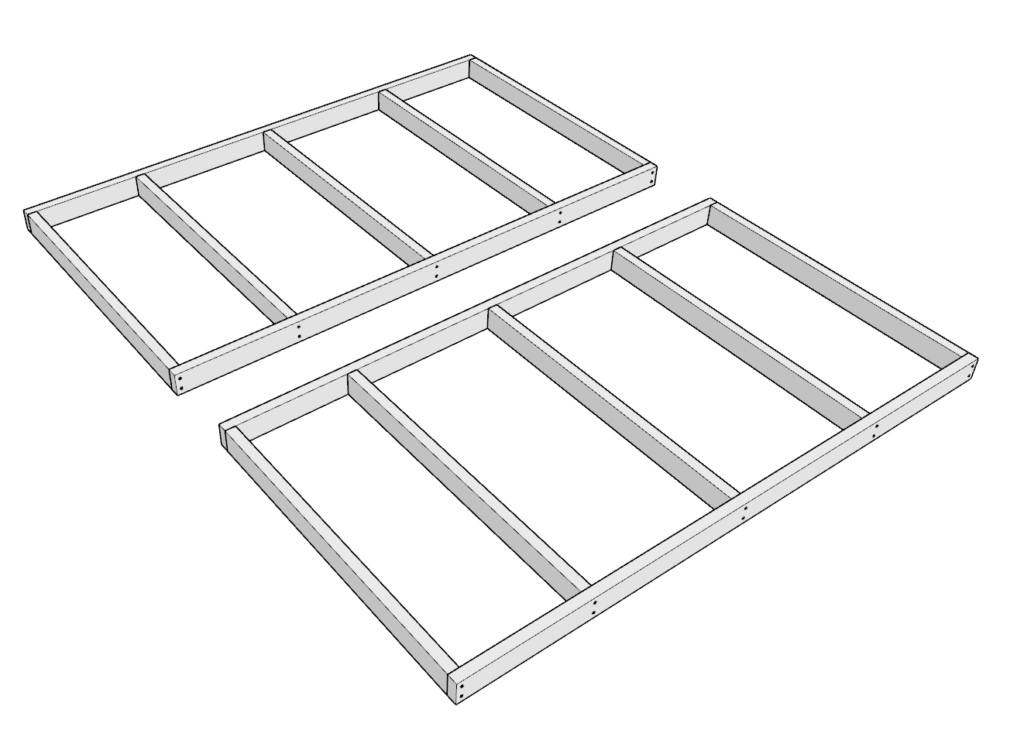
Next, make a second identical frame.
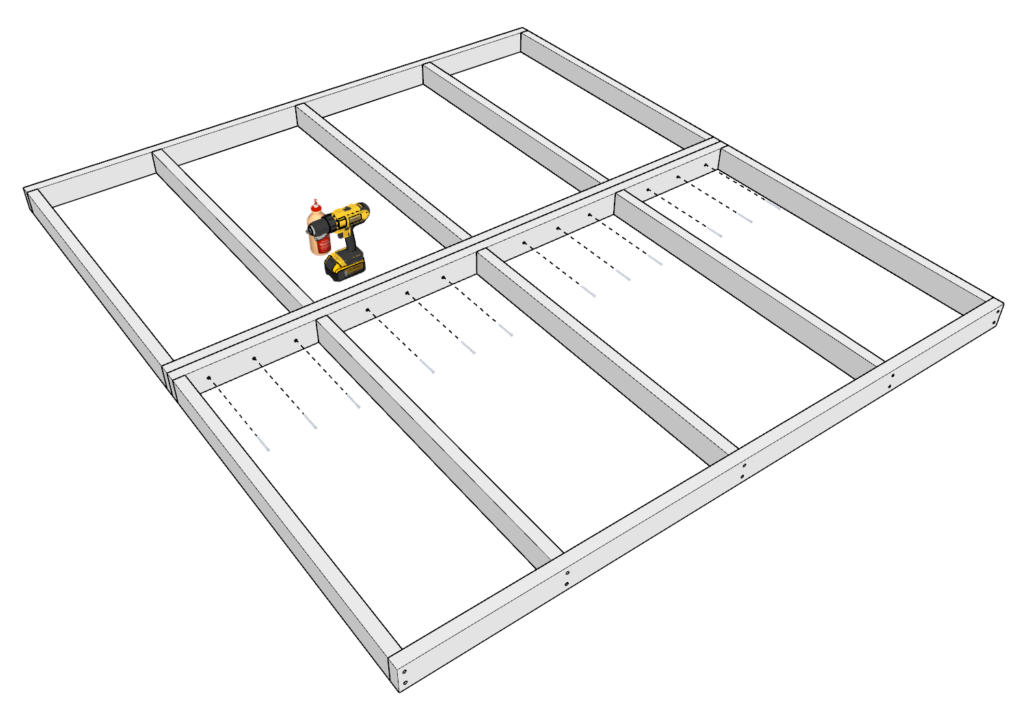
Next, attach the ii frame pieces. Use ii.5 inch screws so that the screws don't show through. Predrill, and add glue.
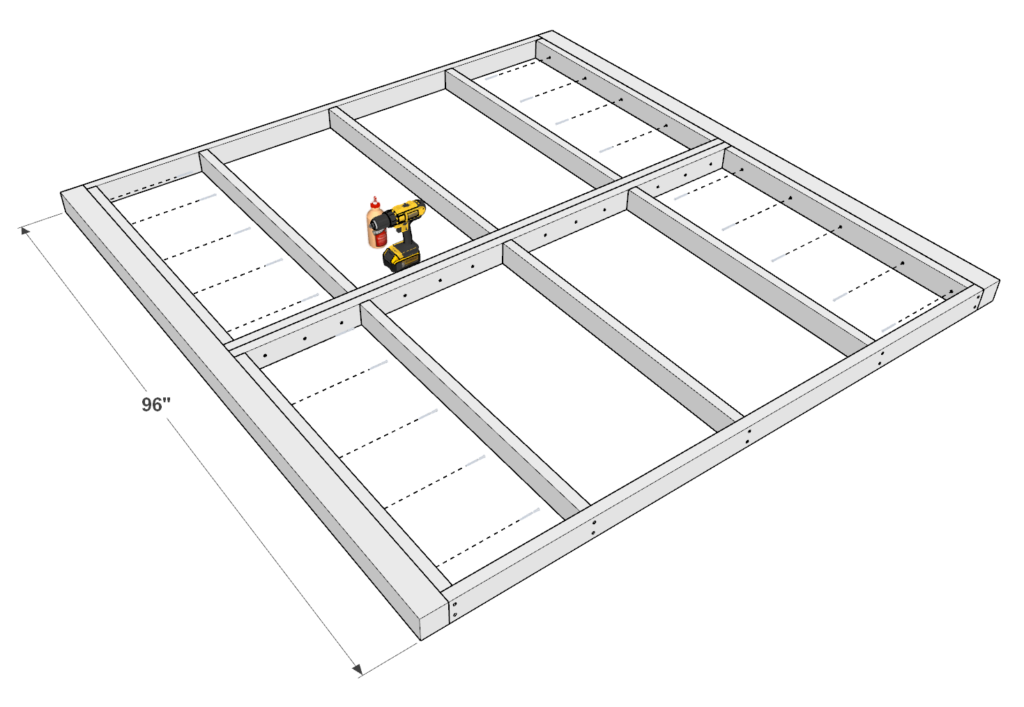
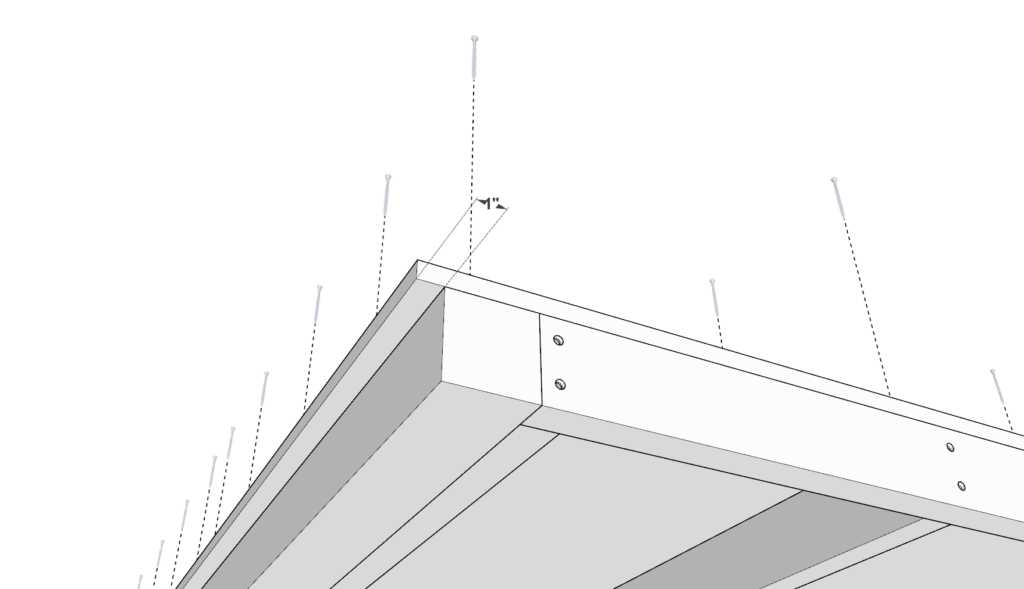
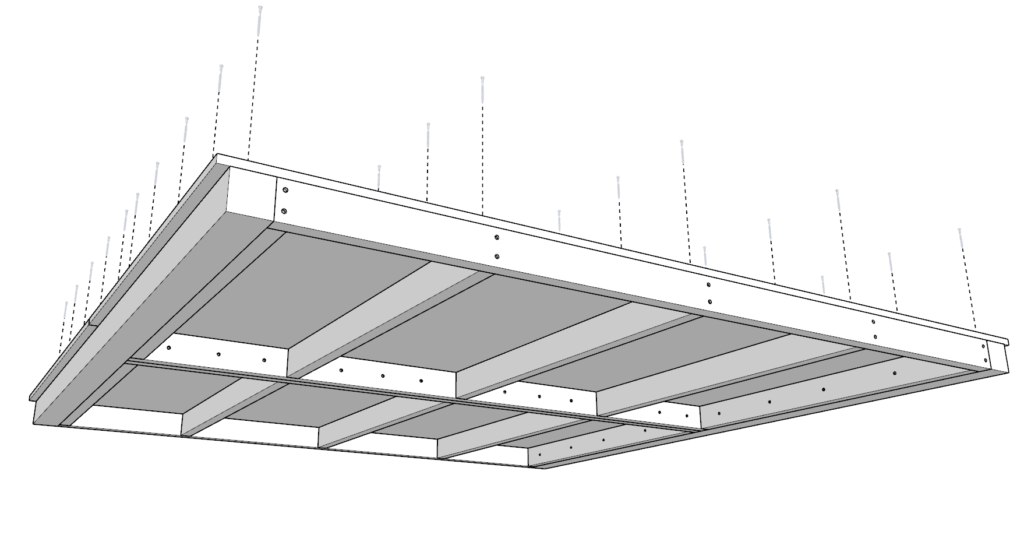
Adjacent, add 2 96 inch 4×4 lumber pieces to the sides of the frames for added force. Attach the frame pieces with three.v inch screws and mucilage.
Adjacent, add two 48 inch ten 96 inch plywood sheets to the frame. The plywood sheets volition stick out by 1 inch on 2 sides of the roof. predrill, add glue, and add 3.v inch screws to secure the rood console.
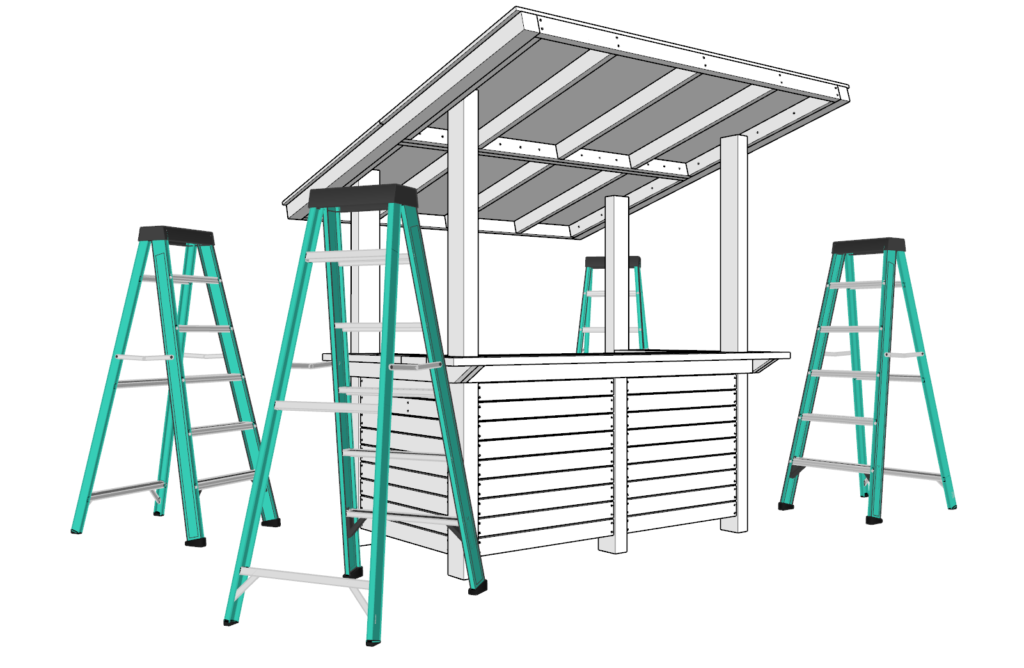
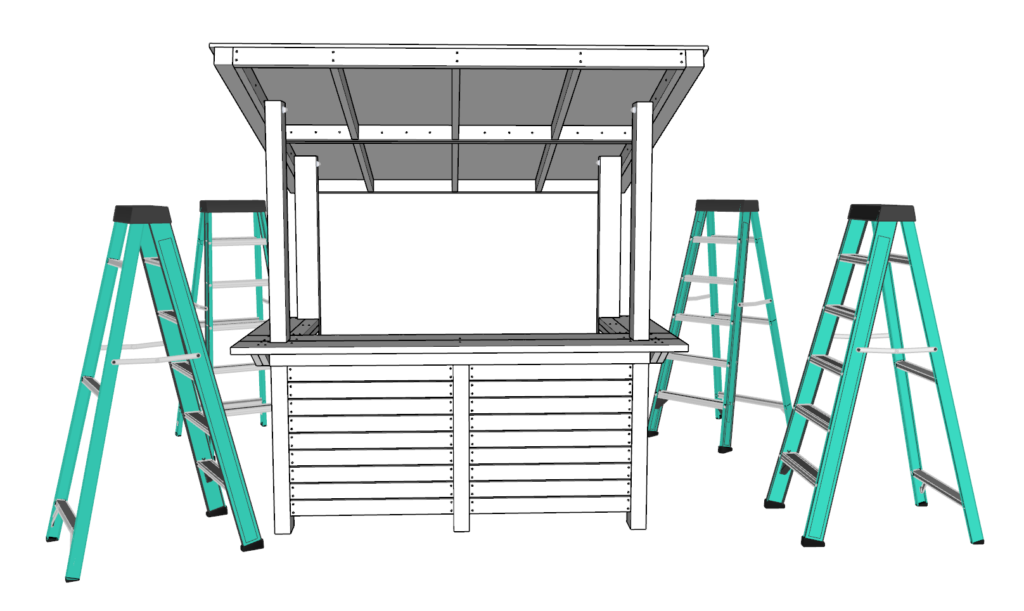
Next, attach the roof of the bar to the bar pillars.
This is the heavy office that will require help.
First, identify ladders around the parameter of the bar and lift the bar roof with the aid of at to the lowest degree 4 people.
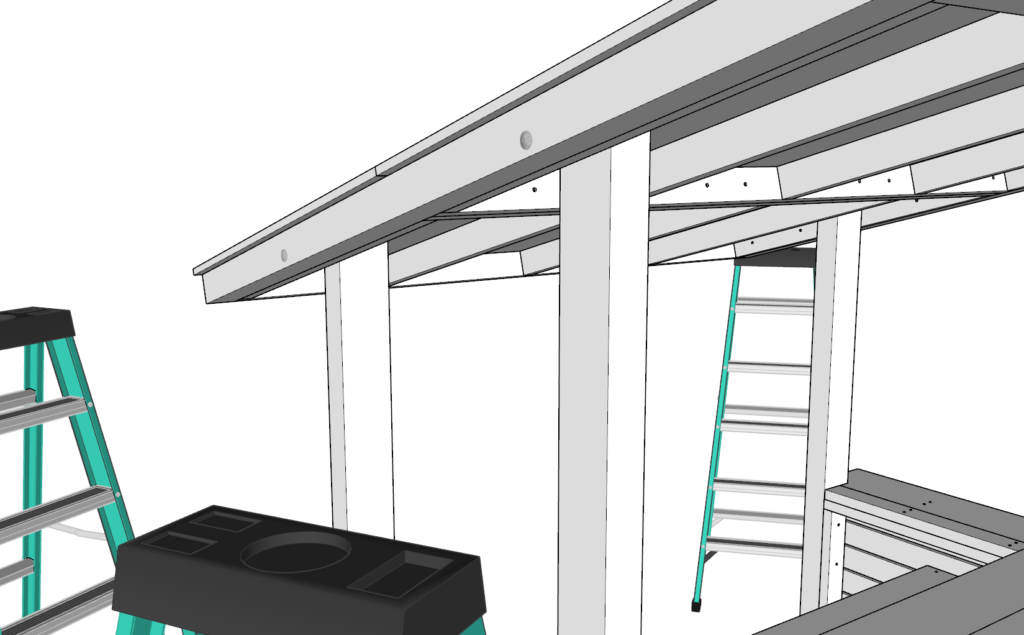
Place the roof on top of the pillars.
Adjust the height of the roof in the back of the bar and so that you can comfortably walk in and out of the bar expanse. If your taller then move the roof college upwardly. if your shorter then bring information technology down.
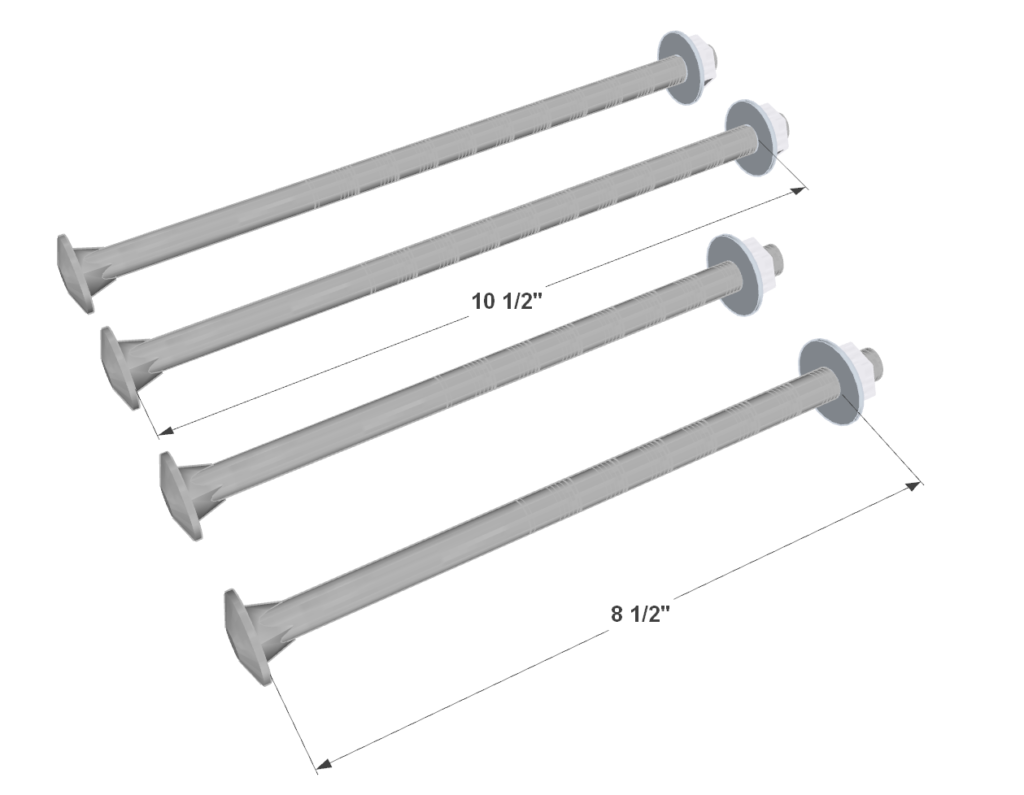
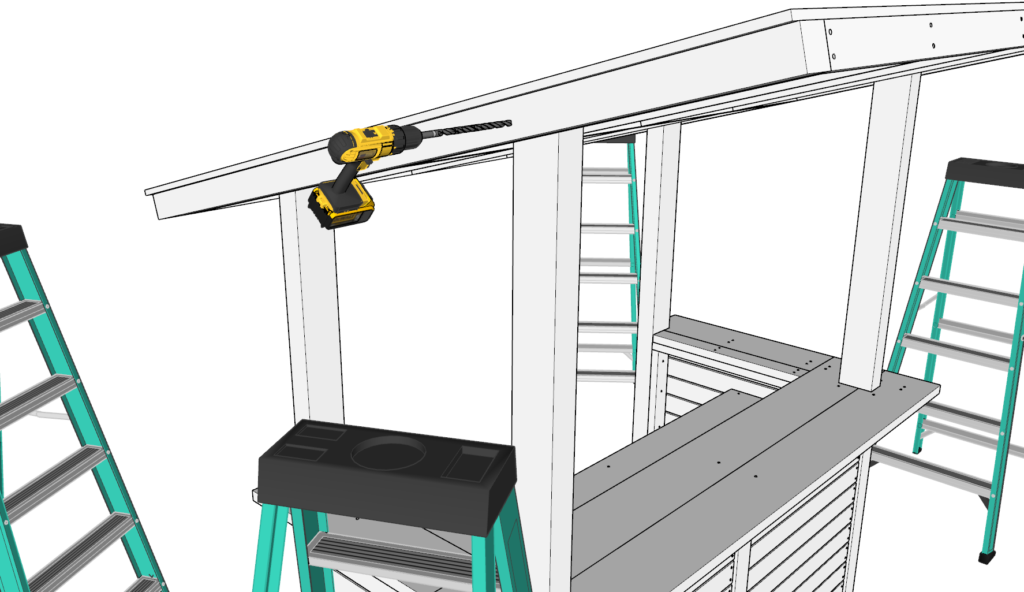
Once you choose a comfortable roof height, drill through the roof frame and the pillars with a long drill chip.
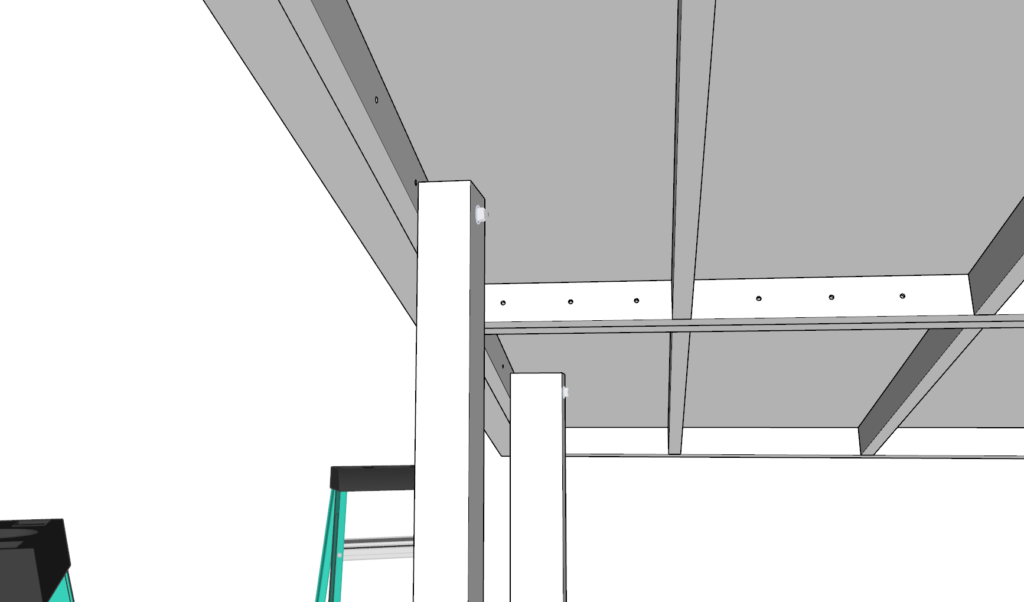
Adhere the roof and pillars with nuts and bolts.
Next add fabric to protect the plywood sheets and roof. This tin be either a thatched roof, shingle roof, tile roof, or metal roof. These DIY plans do no get into detail about how to attach the various roof options
Lastly, sand downward the whole bar. I employ an orbital sander to speed up the process
I use a crude lxxx dust paper commencement and so end it with a 220 grit newspaper.
Filling in the holes is optional.
I also like to utilise a router on the perimeter edges of the bar tiptop to round off my corners and then that the top doesn't printing in on the forearms and elbows when its in use. This makes the table more than comfortable. This tin can also be washed with a sander if you don't have a router on hand.
At this point it is set to be stained or painted!


0 Response to "How To Build An Outdoor Bar With Roof"
Post a Comment